Audi TT Forum banner

Roadster Drain Tubes / Pipes How To

27K views 69 replies 26 participants last post by  kinell2002  
#1 ·
I spent literally days searching for this info to find a way of changing them without either taking the roof off or paying ££££s to Audi.

I haven't done this yet but will be tackling it the week after next after our holiday.

Hopefully posting this link here http://www.ttforum.co.uk/forum/viewtopic.php?f=2&t=294272&start=15 will help other people find it!
 
#2 ·
What about making it a sticky mods :idea:
 
#4 ·
Picked up the new pipes today. £58 for the pair from TPS. They come complete with the rubber grommets at the wheel arch end all as 1 single part. The part number is: 8N7 825 597 C (8N7825597C). I think they also have an "S" prefix which the guy told me meant that this part has superseded the original part. (Part numbers 8N7825597A / 8N7825597B and 8N7825599 all showed up when I was searching).

They look like they've changed the design from the original, no flimsy plastic outer. They are a neoprene/foam tube with a spring coil running the whole length, presumably to keep their shape. The spring also probably helps to collect debris and muck inside the tube and stop it running out the bottom :roll: It still doesn't feel like the strongest material so will still have to be very careful when unblocking them.

I plan to heat shrink them before installing to help protect them and incase the foam ever gets punctured.


We're away on holiday soon and won't be tackling this until the first week of March, so won't be on this thread too much until then.
 
#64 ·
Be careful - there's a whole load of expensive, or impossible to get hold of anymore, electronic kit behind the seats and on the floor! I just ran a drain clearing wire down mine - look for a little plastic tray under the leading edge of the hood as iy meets the trailing edge of the door (there's one each side. In a corner of the tray is the drain hole.
 
#9 ·
#11 ·
The tubes are made from some kind of foam/rubber/neoprene material. There is still a spring down the middle but they don't have a thin plastic outer on the them.

This is the state of the tubes we took out:


The passenger side was completely trashed all the way along it's length and bits of it were broken up and had parted from the rest of the tube. The drivers side was in better condition but the the foam had broken up and the plastic outer was perforated in a lot of places along its length.

New tubes


We bought heat shrink wrap to cover the tubes in for extra protection, but it was quite heavy duty so decided not to use it as it would have made the tubes too rigid and difficult to poke through the holes in the wheel arches.
 
#13 ·
First of all jack up the car and take the wheel off. Use an axle stand.


Unscrew all the torx screws holding the wheel arch liner on.


(this one was a bit awkward to get started).

Arch liner off:


And you can see the outlet at the bottom of the arch:


We pulled the bung out and some of the tube came with it, the rest was left behind.

Pulling this bung out, a bit higher up the arch, means you can shine a torch and peek inside to see your hoses:


This is looking through the hole. (Pic taken at end once hose had been replaced).

 
#14 ·
nott said:
How did it go fitting them ?

How long and how difficult was it ?
The actual fitting took about 10 minutes once we'd stripped enough of the car apart to get access. I wasn't able to get my hands in there, luckily Laura has smaller hands and bendier wrists. She was able to get her hand in and reach bottom of the drip tray to connect the hose on directly while I looked through the top hole in the arch and guided her onto it.
 
#15 ·
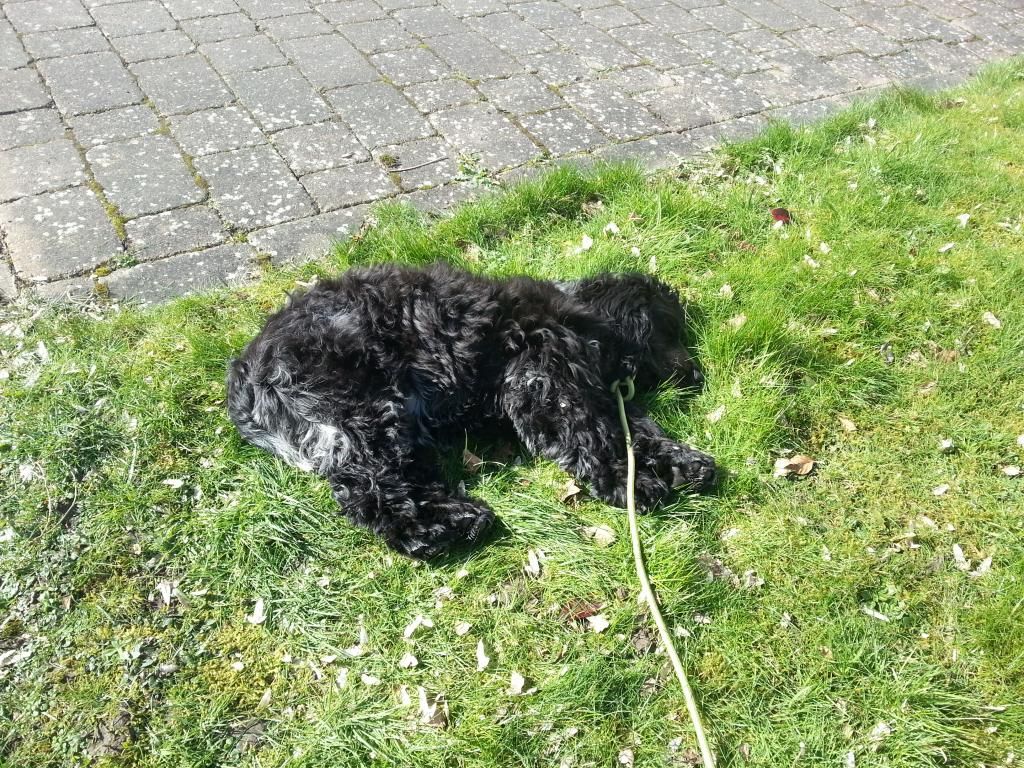
Hamish was helping us


But his paws were too big to fit in the gaps, so he had a snooze instead


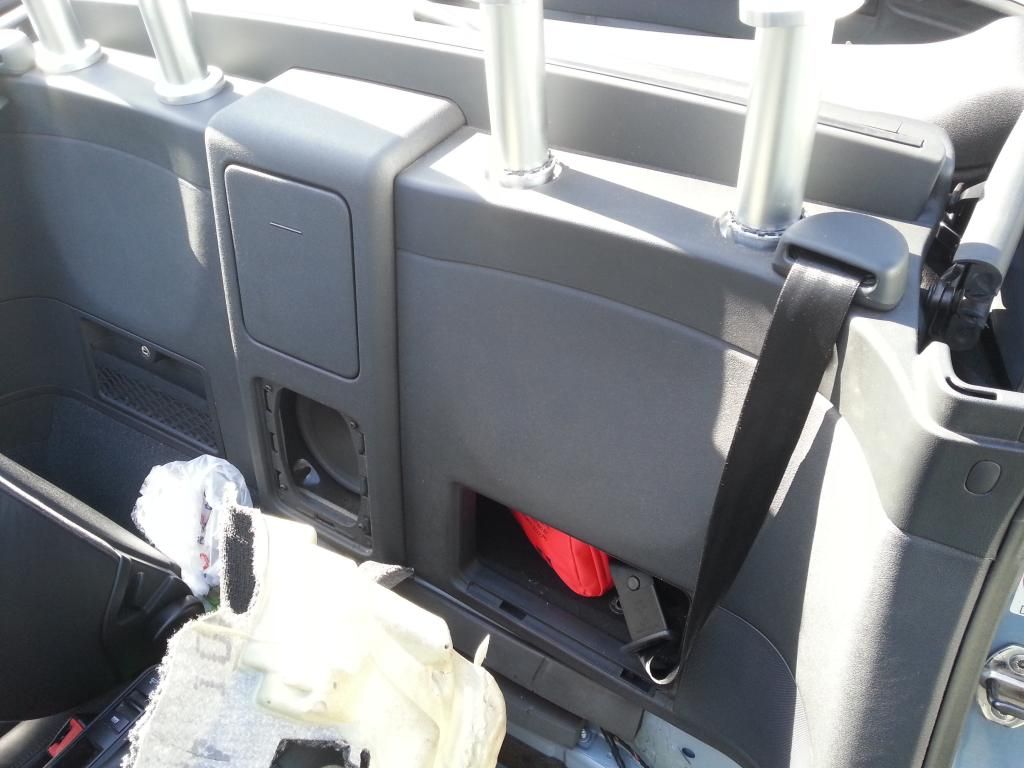
Bits that had to come off.

The passenger seat was already out & carpet lifted. Under the seat is 2 plugs, if you unplug them and turn on the ignition you will throw up the airbag light. We had to move the car so had to reset the light afterwards with the scanner/VCDS. The drivers side we did without removing the seat.

- First carefully prise out the speaker grill. Be careful as it's quite flimsy, ours was already cracked from someone's previous effort. You can see the carpet lifted in the bottom of the pic where we were drying it out and also the seatbelt bottom mounting is undone, again this was to get at the carpet.


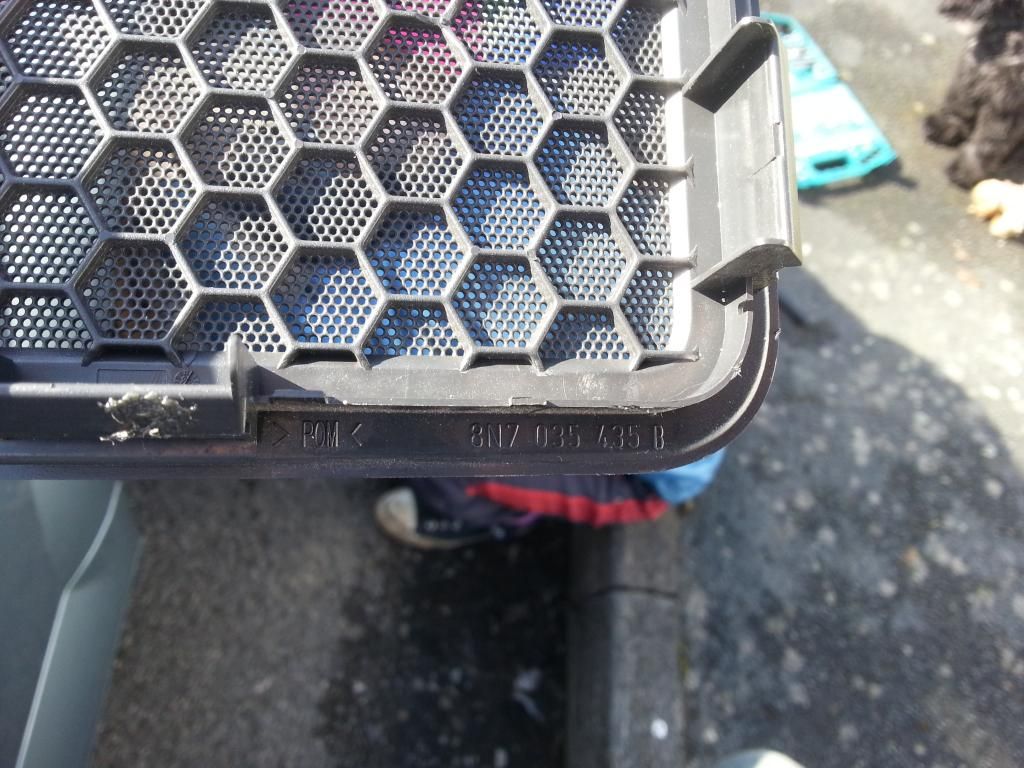
This is the part number, I was going to get another one but once it's fitted you can't see the crack at all.


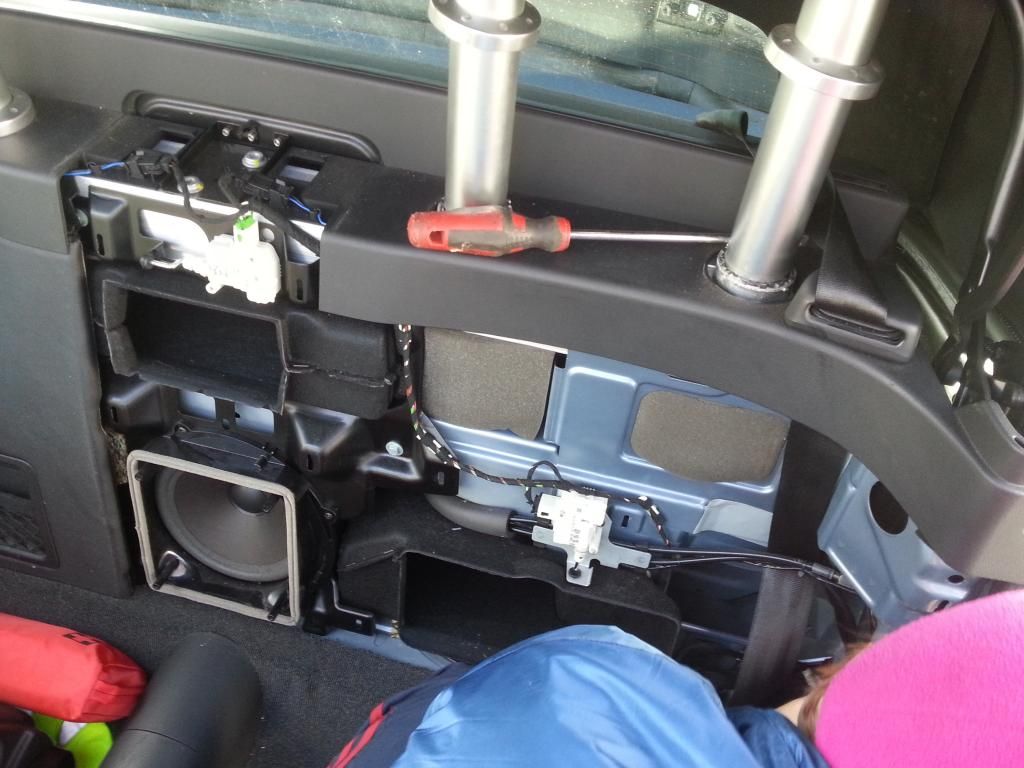
- Unscrew the 4 screws around the sub woofer.

- The centre panel then "just" pulls off. It's quite difficult to get out and took a look of pulling and levering. If you use a big screwdriver put something either side of it to protect the plastic.

- Pull of the large panel from behind the seat. If you turn the collars on the roll bar they unclip and then lift up, this allows a bit of movement on the top panel (which doesn't have to come out). Starting at the bottom of the panel pull it towards you and unclip all the metal clips, once the panel is free from the bulkhead pull it downwards away from the top plastic panel.

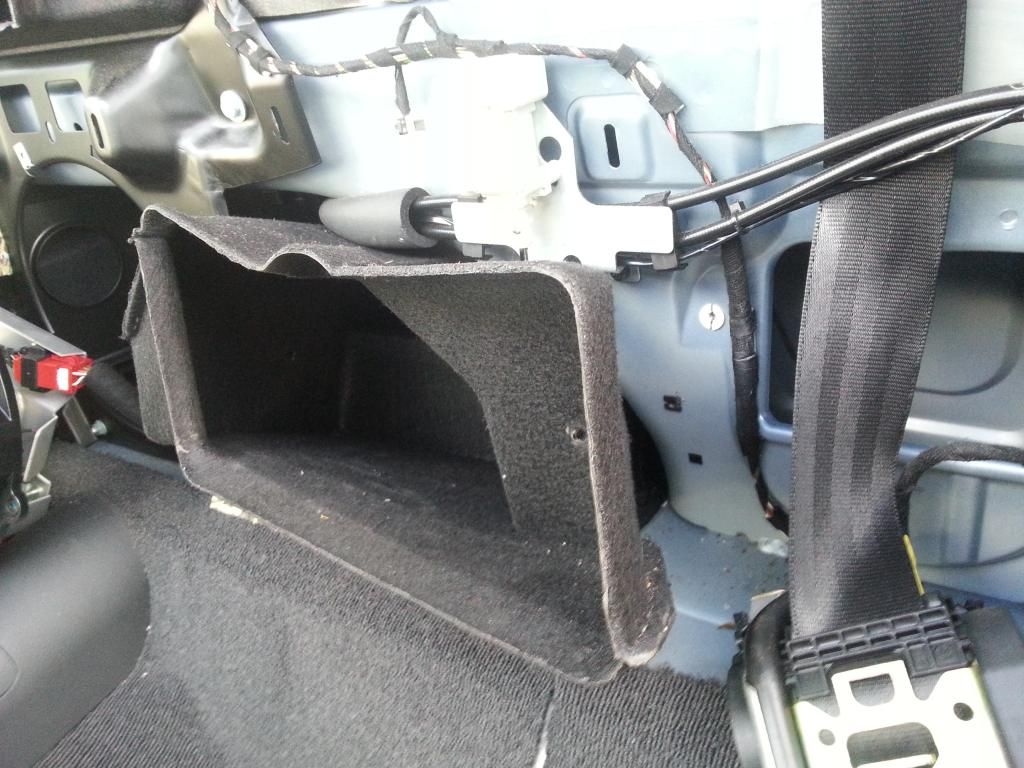
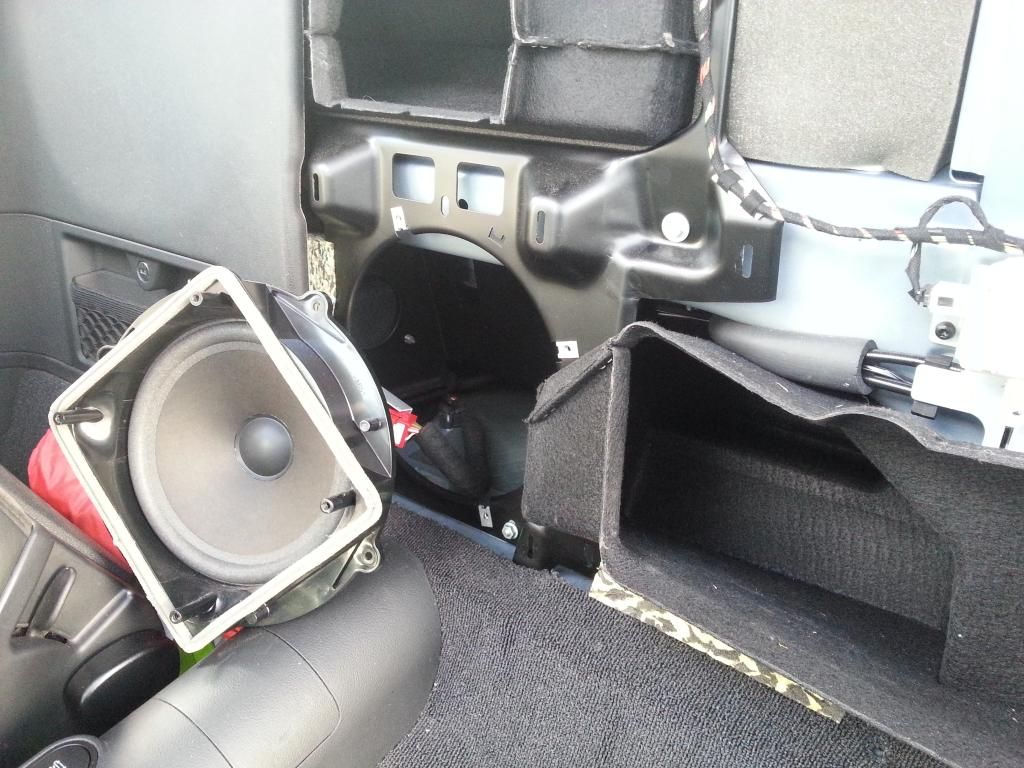
This is what you should see


- Next take out the seatbelt reel & speaker. The speaker needs removing from its mounting bracket then the bracket just unscrews with 3 torx screws.
The seatbelt has a 17mm bolt, then the reel lifts up slightly to disengage from the "T" shape slot, push it back in away from it's mounting panel then pull it forward and out of the way. There is a small yellow plug that just pulls off the side.
This square hole where the seat belt was is where you need to get your hand in to get access to the tubes.


- We found the cubby hole liner was in the way of where you wanted to have your elbow when poking your arm in through the hole to reach at the tubes. To get the cubby box free there is a torx screw and 2 grey plastic plugs which just prise out, take them out.
Then unscrew the subwoofer and pull it forward out of the way.


This allowed the cubby box to be moved around out the way, it wouldn't actually come out without removing the bracket that the sub mounts to, but we got enough movement to get access.

 
#16 ·
Now there are no real photos of how to actually change the hoses as it's all hidden behind panels and done by feel.

What we did was reach in through the seatbelt reel hole and there is another small hole you should be able to get your hand through. Reach up towards where the drip tray is and you should hopefully feel the hose. Pull it off the drip tray than pull it out through the wheel arch hole.

Laura then reached in down towards the arch outlet hole and I poked the new hose in the hole. She managed to grab it then as I pushed it in she guided it up towards the drip tray. She then changed hands and grabbed the pipe (I think with her left hand for the passenger side) while bending at a very awkward angle and managed to reach up close to the drip tray. I looked through the top arch hole using a torch and guided her to connect the hose to the drip tray.

The theory of this bit is very simple, it's just very awkward angles that you have to bend your arms in to get to it. It resulted in a bit of swearing when the pipe got dropped a couple of times and quite a few scratches up her arms. Once the top is connected outlet of the pipe simply needs pushing into the hole in the arch.

Put everything back together, smile briefly at your triumph then start on the other side!

Sorry it's badly written but I hope it makes sense and helps. Let me know any questions and I'll try to answer :)
 
#23 ·
Yep soggy floors due to the rubbish original fit tubes! Just been tackling the passenger side as you showed in the pictures- getting the big panel off was ok apart from breaking a clip holder on the top right hand side just below the seatbelt. Going to repair it with some sugru and it'll be fine.

I'm hanging back on removing the speaker & seatbelt cassette as my little daughter can reach in through that quadrangular hole on the side and feed the new pipe through, will have to see if she can manage to secure it at the drip tray tomorrow as rain has stopped play today. Can I ask if the drivers side is much different? I'm guessing you removed the speaker & seatbelt cassette there too?

A tip for others tackling this- use an electricians cable feeder rod set to feed the new pipe through from the wheelarch end up into the car to attach to the drip tray outlet (feed the cable rod into the drip tray and down into the arch first - whichever is easiest for you) I used a similar set to this but much cheaper from amazon or the cheap tool outlets

Image


Its much easier than using string!
 
#24 ·
bobdabuilda said:
Yep soggy floors due to the rubbish original fit tubes! Just been tackling the passenger side as you showed in the pictures- getting the big panel off was ok apart from breaking a clip holder on the top right hand side just below the seatbelt. Going to repair it with some sugru and it'll be fine.

I'm hanging back on removing the speaker & seatbelt cassette as my little daughter can reach in through that quadrangular hole on the side and feed the new pipe through, will have to see if she can manage to secure it at the drip tray tomorrow as rain has stopped play today. Can I ask if the drivers side is much different? I'm guessing you removed the speaker & seatbelt cassette there too?

A tip for others tackling this- use an electricians cable feeder rod set to feed the new pipe through from the wheelarch end up into the car to attach to the drip tray outlet (feed the cable rod into the drip tray and down into the arch first - whichever is easiest for you) I used a similar set to this but much cheaper from amazon or the cheap tool outlets

Image


Its much easier than using string!
If your daughter can get her arm in, you can look through the hole in the arch with a torch and guide her onto the tray, that's what I did :)

The driver's side is pretty much the exactly the same, the storage compartment is a slightly different shape but that's all. We didn't even remove the drivers seat, only the passenger seat as it was out anyway for drying the carpet.

My Dad happened to have a big cable feeder on a roll from work, but we didn't end up using it.

(Just realised my photos aren't working as my photobucket account is maxxed out - Grrr!)
 
#26 ·
bobdabuilda said:
The hole in the arch is the place she got her hand through, but she is only ickle!
Unless she's got really really really wee hands we're talking about something different! Once you take the arch liner off you see the outlet hole for the tubes, about a foot(ish) above that hole is another about the same size with a rubber bung in it. Pull the bung out and you can shine a torch in there and peek in.