Hi all,
As there was a limited amount of information on this subject I decided to document a recent repair.
I aquired a dent in the offside side skirt that was not repairable through paintless dent repair. The side skirt is made of aluminium and unfortunately the dent stretched the metal. Also the chap at excel dents advised that the paint would more than likely bruise and a respray would be needed.
Next option was to get some quotes from a few body repair shops, cheapest being £303 ex VAT! This was to replace the skirt with a new one from Audi (£68 ex VAT), paint it (£80 ex VAT) and fit it (£155 ex VAT including misc. items). Dunno what these misc. items were but never mind.
With it being so close to x-mas I decided that there must be a cheaper option and upon further investigation I managed the following:
£60 - Side skirt in matching body colour off a 2002 model from a breakers advertising on ebay - absolutely mint condition!
£36 - New sill plate from ebay (the black tread plate bit with the TT logo on. Even came with the original foam adhesive and white clips ready to fit.
Okay so the labour was free as I decided to do it myself with the help of a good friend.
![Image]()
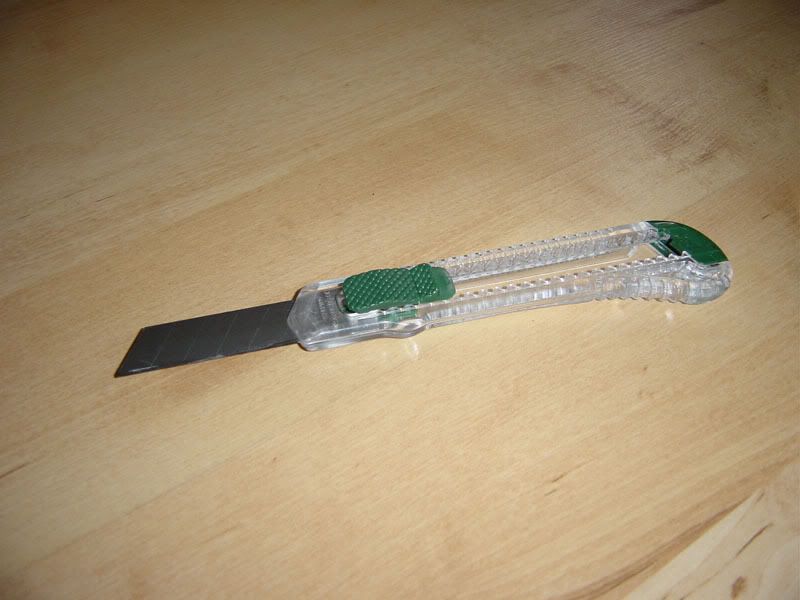
This shows the old foam adhesive that needed to be removed from the replacement skirt. This was difficult and patience was of the essence. The best tool for the job was a craft knife.
![Image]()
Once removed and clean it looked like this:
![Image]()
Removal of the skirt on the car was quite straight forwards. I first masked the paint near the black trim panel to avoid scratches and used a sharpened paint scraper. I just worked it all the way through applying a moderate amount of pressure:
![Image]()
The black trim is also held in place by 4 white clips, 1 at the front end of the trim and 3 at the rear
Front clip:
![Image]()
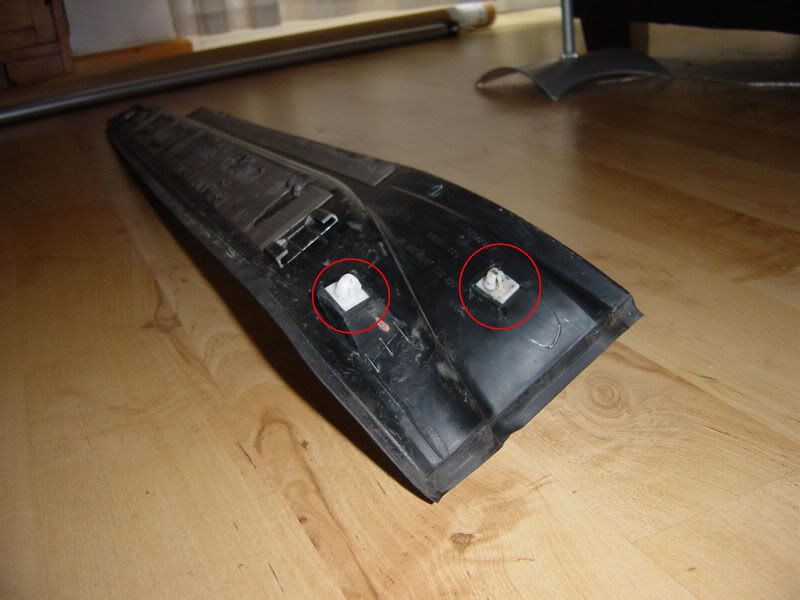
rear clips:
![Image]()
There is one clip missing from this photo but you can see the slot for it above and to the left of the left most clip.
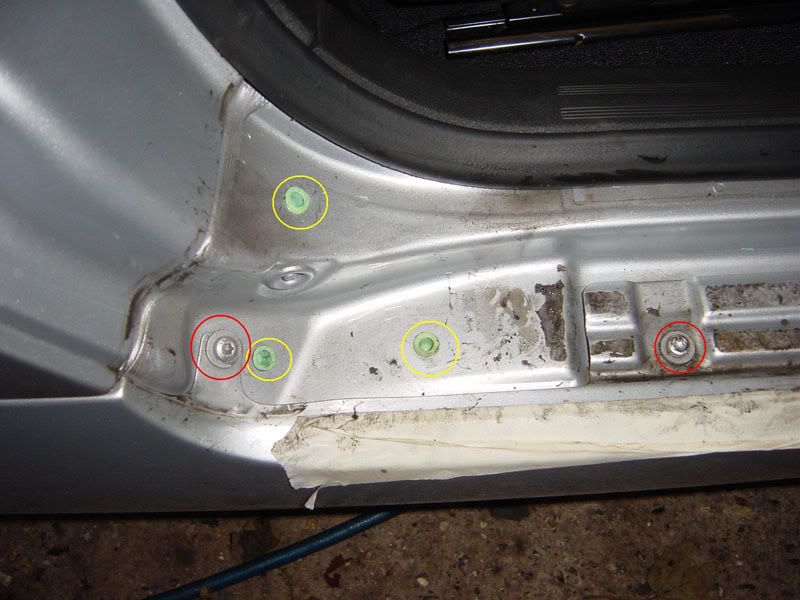
These clips popped out effortlessly and in the following picture you can see where they locate themselves on the car:
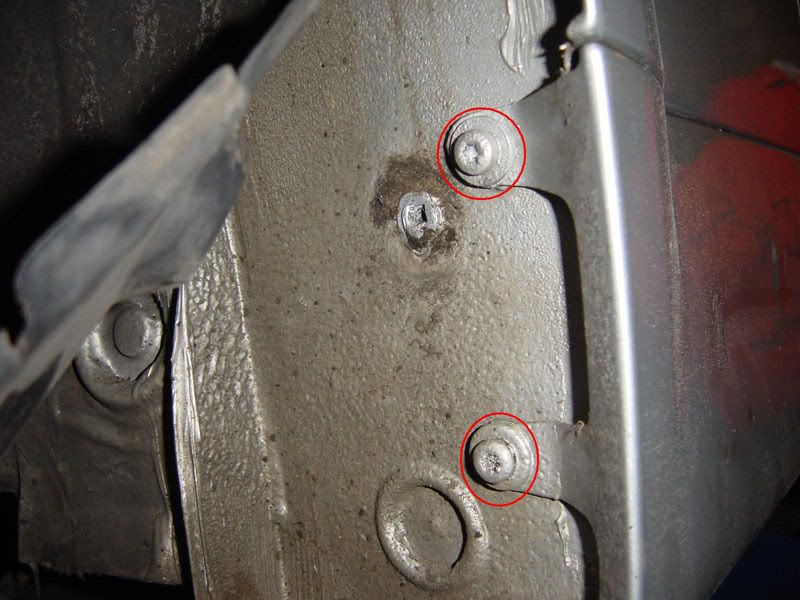
![Image]()
The yellow circles highlight where the clips locate and the red circles are some of the torq screws that hold the skirt to the car.
You will need to remove the front and rear wheelarch lining, but only enough to gain access to the screws holding the skirt on. I removed 5 torx screws from the rear as its not as flexible as the front, and I removed 3 from the front.
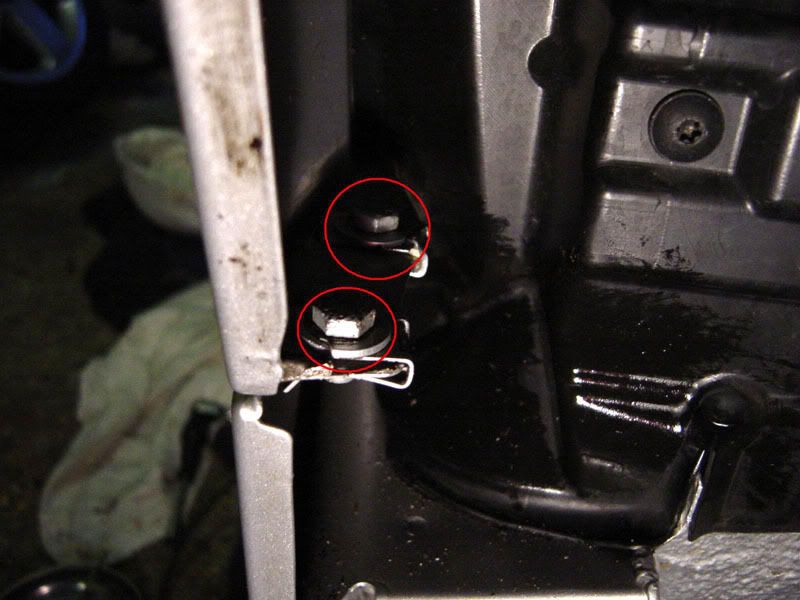
The skirt is held in place by 2 x 10mm screws behind the front wheelarch lining which are straight forward to remove. There are also two clips there that secure it in place:
![Image]()
Held on at the rear by 2 torx screws:
![Image]()
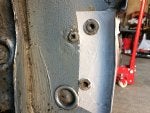
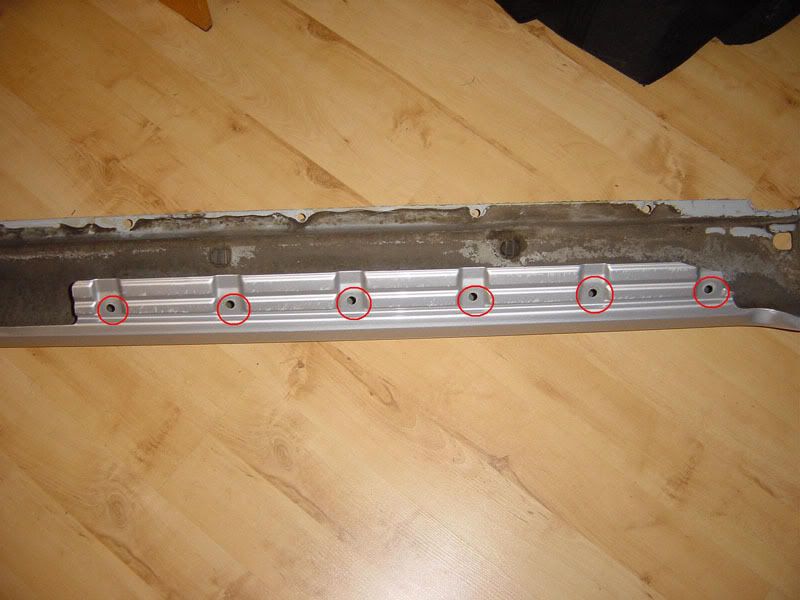
There are 6 torx screws under the black trim plate:
![Image]()
The remaining torx screws are on the underside of the car and covered in waxoyl stuff. Scrape off as little as possible to gain access the the screws and thats all the screws out.
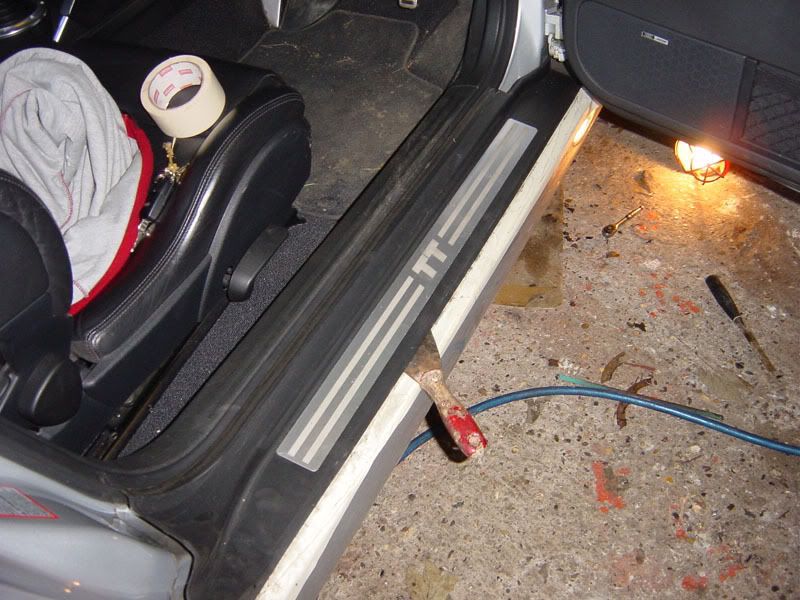
I found that because of the wayoyl stuff, the skirt was stuck to the underside of the car. My good friend made up a little tool to help get this off:
![Image]()
Just a small peice of metal plate bent at 90 degrees and held with a pair of mole grips. You can insert it at the front on the underside and slide it all the way to the back - hey presto the skirt fell off!
Once youve got this far, putting the new one on is just the reverse of the above. the new black trim plate is easier to fit from the front first, locate the front clip and insert the rear clips last. It was a bit fiddly and I ended up sticking the little white clips in as they kept falling out. I would recommend the use of axle stands as this makes life a lot easier:
All in all it took about 4 hours but we were taking our time and there were a few tea breaks :roll: There are a couple of other reference photos in the fotki folder
Hope this comes in handy.
Joss.
As there was a limited amount of information on this subject I decided to document a recent repair.
I aquired a dent in the offside side skirt that was not repairable through paintless dent repair. The side skirt is made of aluminium and unfortunately the dent stretched the metal. Also the chap at excel dents advised that the paint would more than likely bruise and a respray would be needed.
Next option was to get some quotes from a few body repair shops, cheapest being £303 ex VAT! This was to replace the skirt with a new one from Audi (£68 ex VAT), paint it (£80 ex VAT) and fit it (£155 ex VAT including misc. items). Dunno what these misc. items were but never mind.
With it being so close to x-mas I decided that there must be a cheaper option and upon further investigation I managed the following:
£60 - Side skirt in matching body colour off a 2002 model from a breakers advertising on ebay - absolutely mint condition!
£36 - New sill plate from ebay (the black tread plate bit with the TT logo on. Even came with the original foam adhesive and white clips ready to fit.
Okay so the labour was free as I decided to do it myself with the help of a good friend.
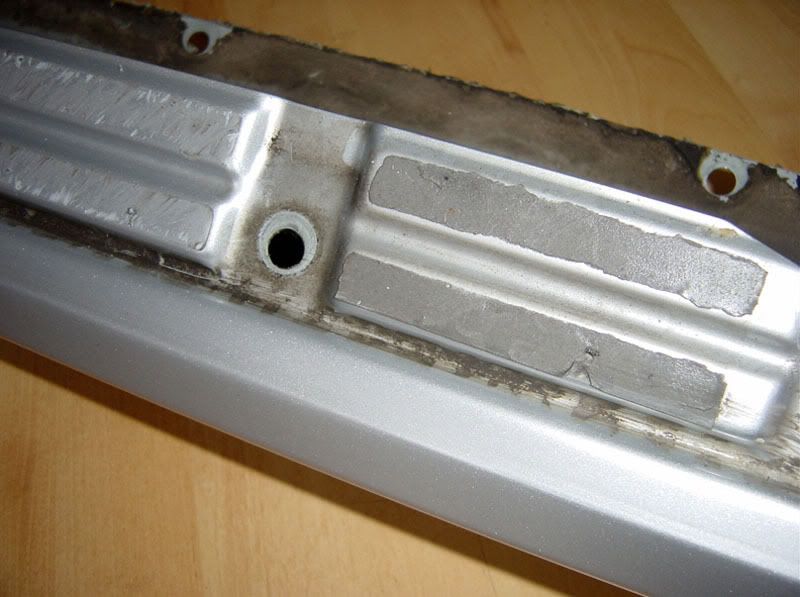
This shows the old foam adhesive that needed to be removed from the replacement skirt. This was difficult and patience was of the essence. The best tool for the job was a craft knife.
Once removed and clean it looked like this:

Removal of the skirt on the car was quite straight forwards. I first masked the paint near the black trim panel to avoid scratches and used a sharpened paint scraper. I just worked it all the way through applying a moderate amount of pressure:
The black trim is also held in place by 4 white clips, 1 at the front end of the trim and 3 at the rear
Front clip:

rear clips:
There is one clip missing from this photo but you can see the slot for it above and to the left of the left most clip.
These clips popped out effortlessly and in the following picture you can see where they locate themselves on the car:
The yellow circles highlight where the clips locate and the red circles are some of the torq screws that hold the skirt to the car.
You will need to remove the front and rear wheelarch lining, but only enough to gain access to the screws holding the skirt on. I removed 5 torx screws from the rear as its not as flexible as the front, and I removed 3 from the front.
The skirt is held in place by 2 x 10mm screws behind the front wheelarch lining which are straight forward to remove. There are also two clips there that secure it in place:
Held on at the rear by 2 torx screws:
There are 6 torx screws under the black trim plate:
The remaining torx screws are on the underside of the car and covered in waxoyl stuff. Scrape off as little as possible to gain access the the screws and thats all the screws out.
I found that because of the wayoyl stuff, the skirt was stuck to the underside of the car. My good friend made up a little tool to help get this off:
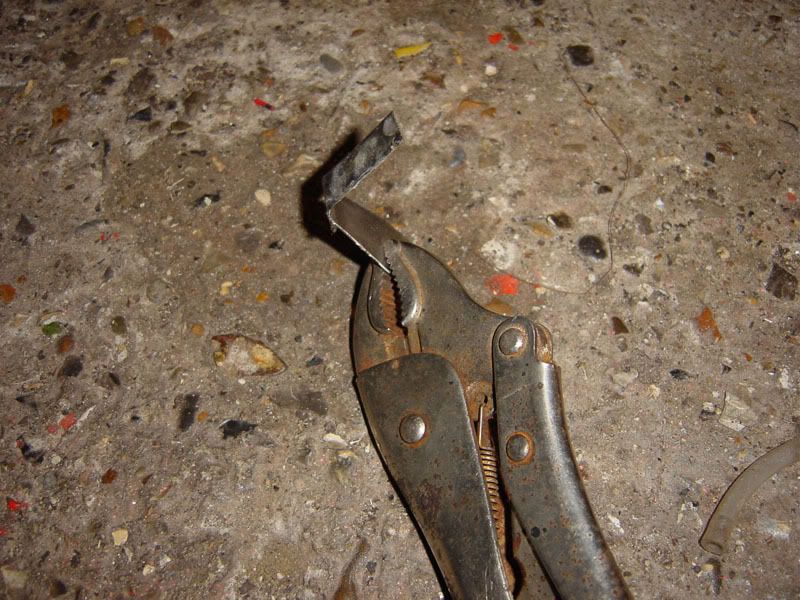
Just a small peice of metal plate bent at 90 degrees and held with a pair of mole grips. You can insert it at the front on the underside and slide it all the way to the back - hey presto the skirt fell off!
Once youve got this far, putting the new one on is just the reverse of the above. the new black trim plate is easier to fit from the front first, locate the front clip and insert the rear clips last. It was a bit fiddly and I ended up sticking the little white clips in as they kept falling out. I would recommend the use of axle stands as this makes life a lot easier:
All in all it took about 4 hours but we were taking our time and there were a few tea breaks :roll: There are a couple of other reference photos in the fotki folder
Hope this comes in handy.
Joss.