

I placed an order with http://www.Sportshifters.com for a custom made shifter and boot. Let me just start off by saying that Roy was AWESOME. I contacted them through Facebook amd we chatted about the options on their website.
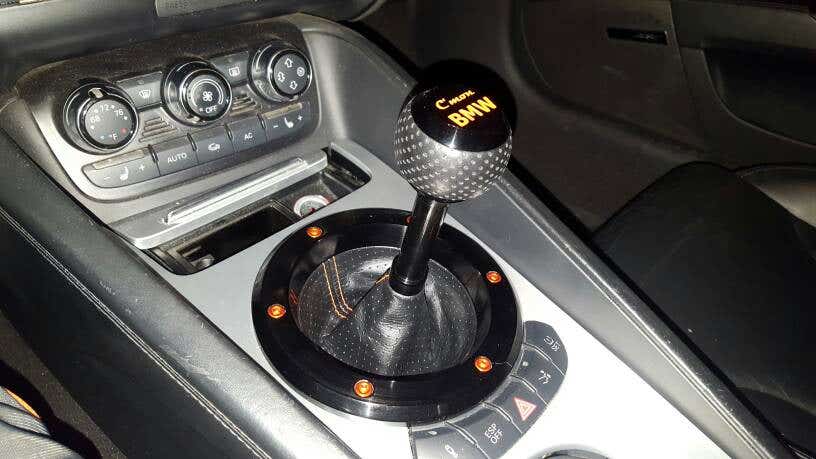
I asked for a light weight and a heavy knob, which was met with amazing precision. I asked for a custom engraving on the top "C'mon BMW" Roy sent me several options he made in AutoCad and I was very happy with the result.
I got a note from my local post office today that they missed me and it will be ready to pick up tomorrow. I say NAY! I hunted down my mailman and got the package today. Hehe
![Image]()
The packaging was very tight and secure.
![Image]()
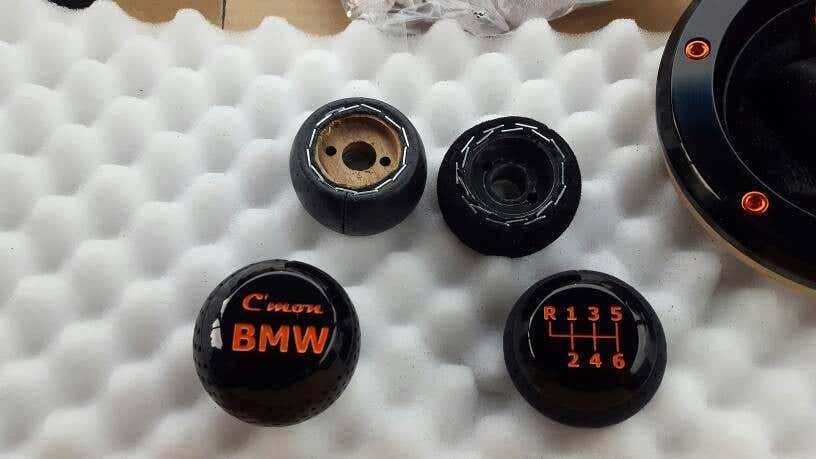
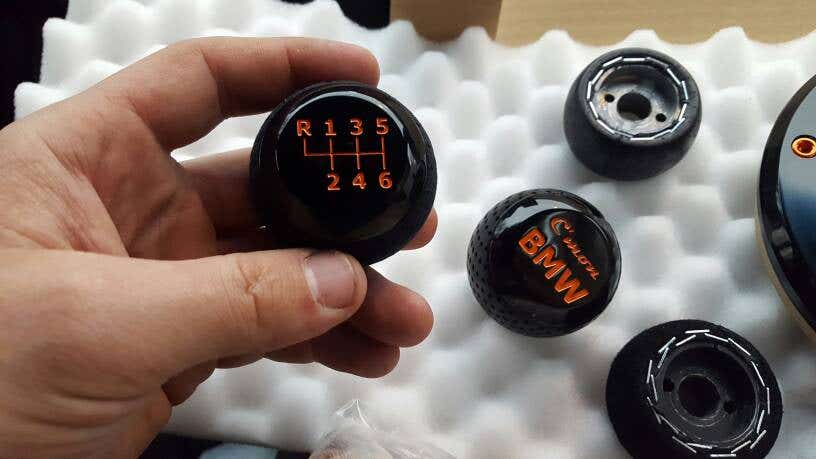
When i opened it, i saw a little surprise!! Roy sent me extra weighted knobs!
I received the following: Perforated Leather (light), Punched Leather (medium), Perforated Suade (heavy), Perforated Ultrasuade (heavy).
![Image]()
![Image]()
![Image]()
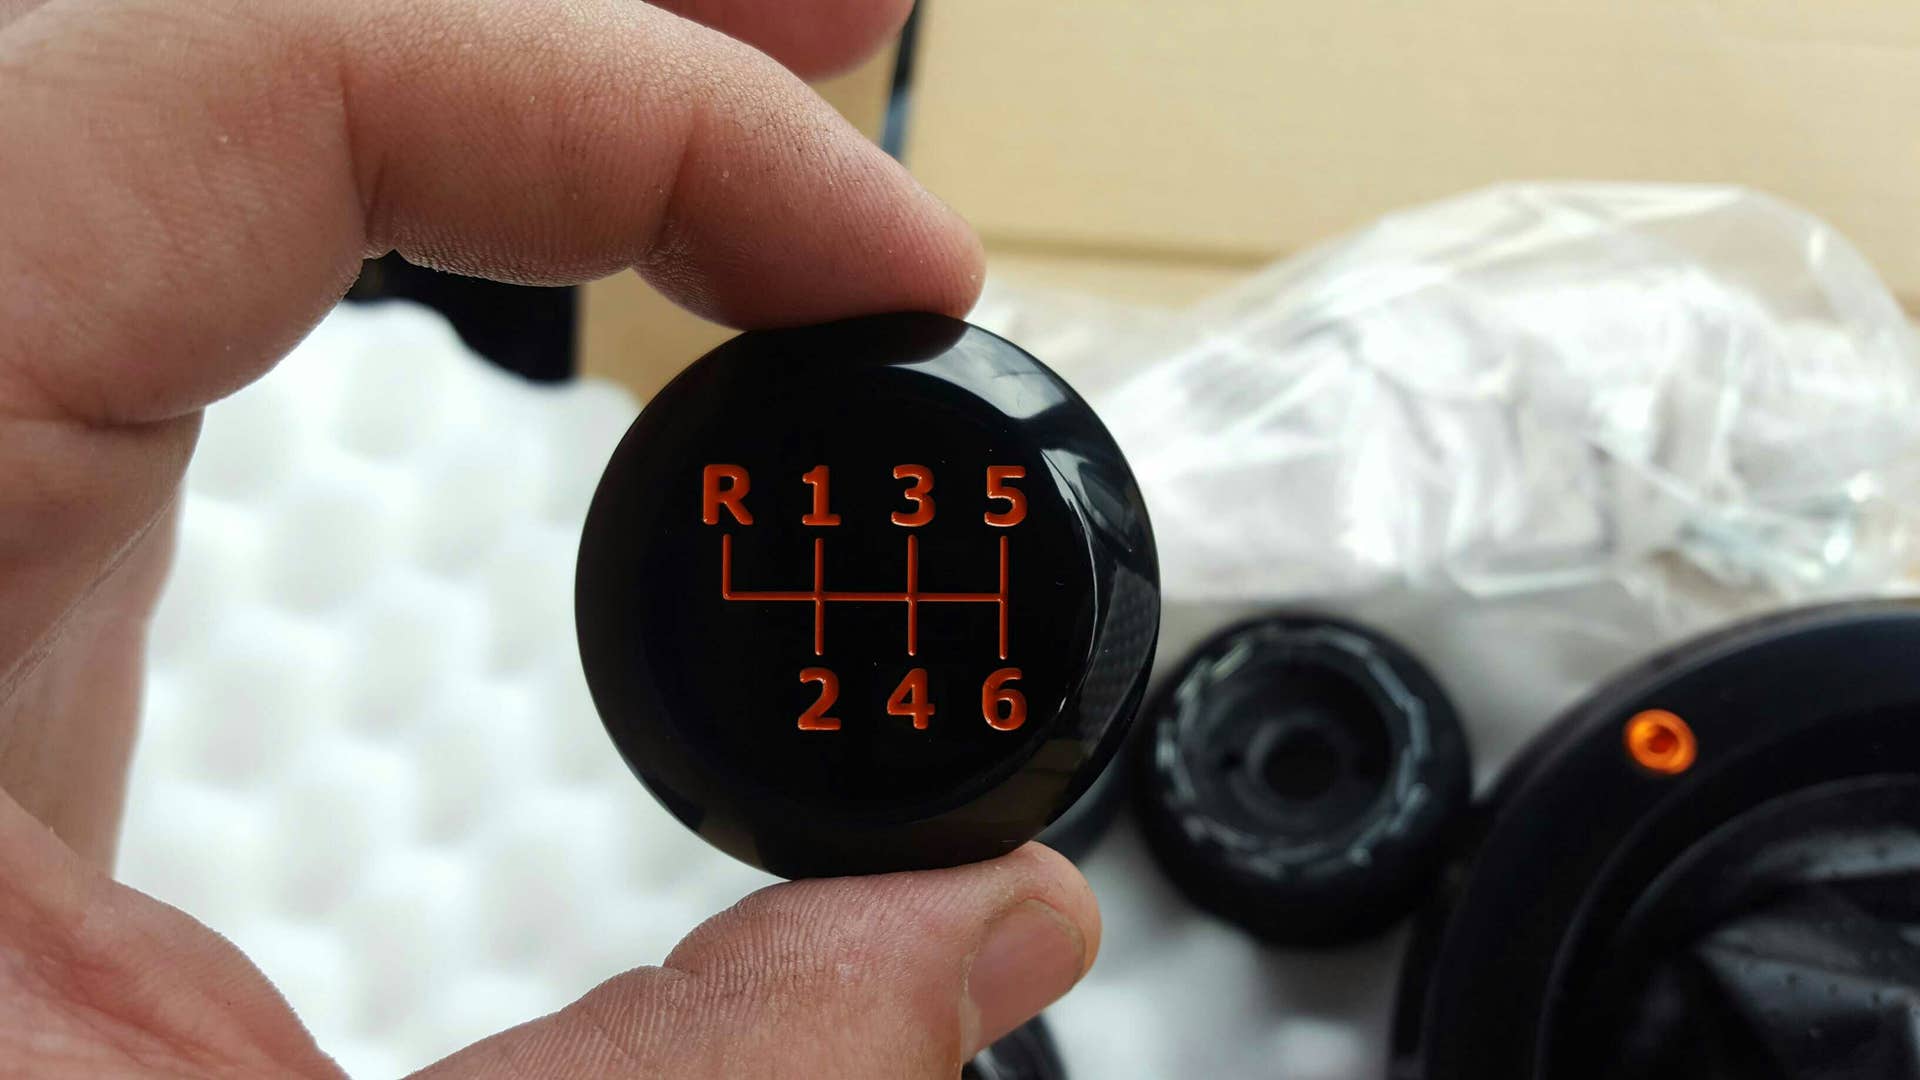
One knob was completely assembled to show how to assemble additional knobs.
![Image]()
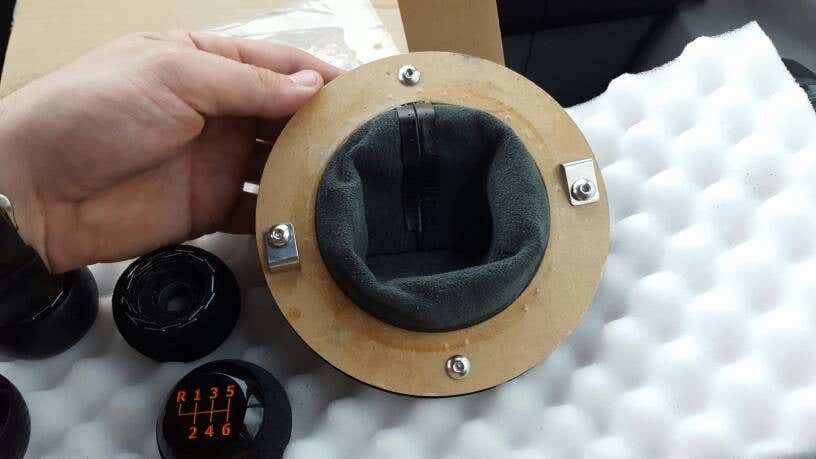
The shift pattern is held in place by bolts from underneath.
![Image]()
![Image]()
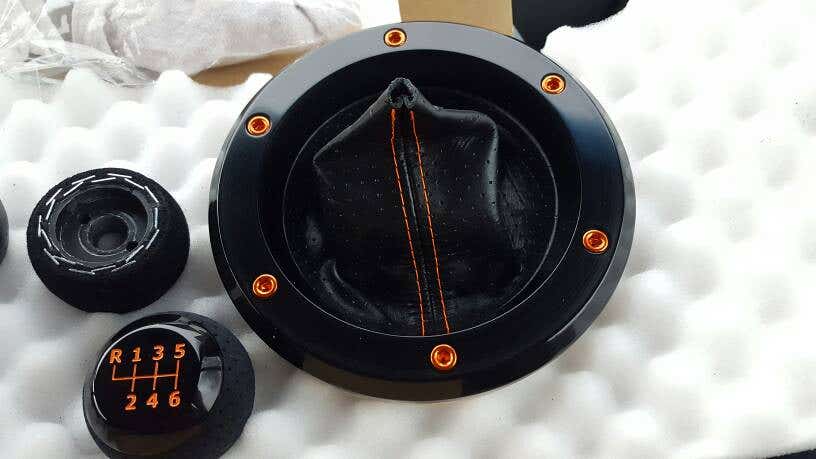
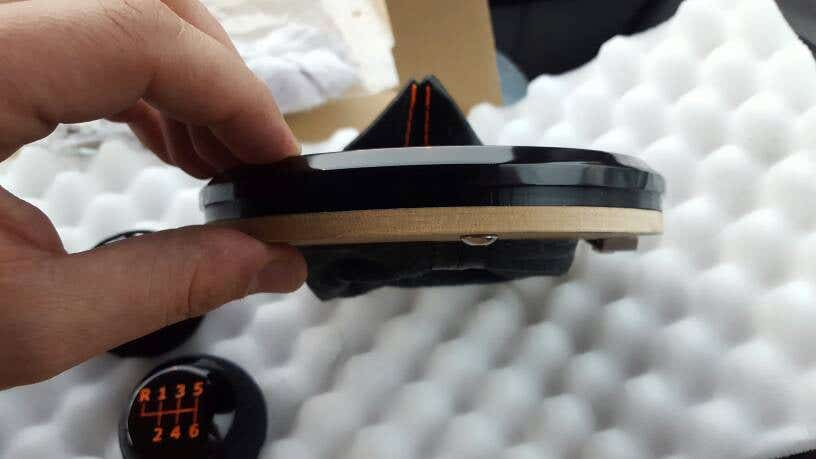
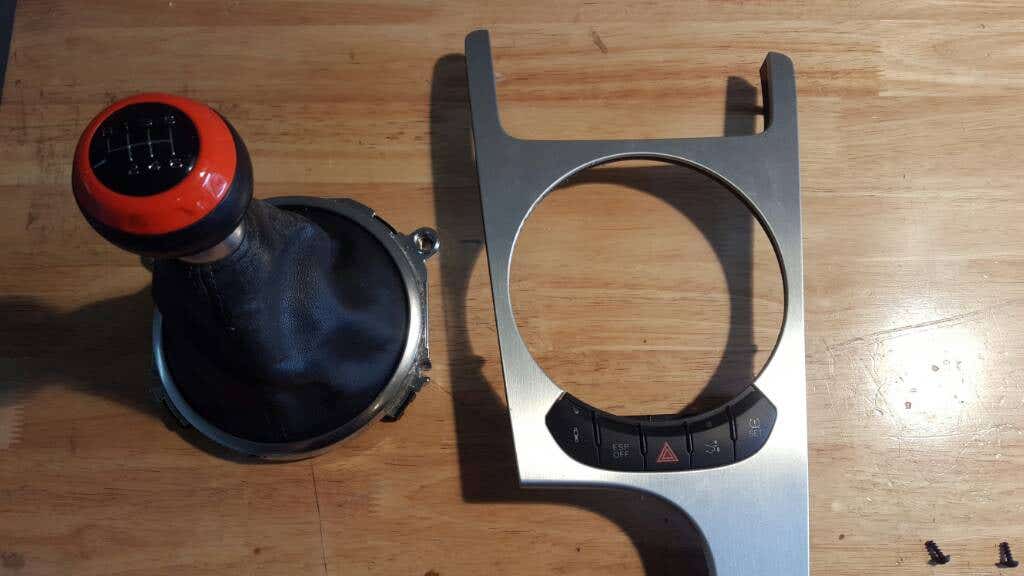
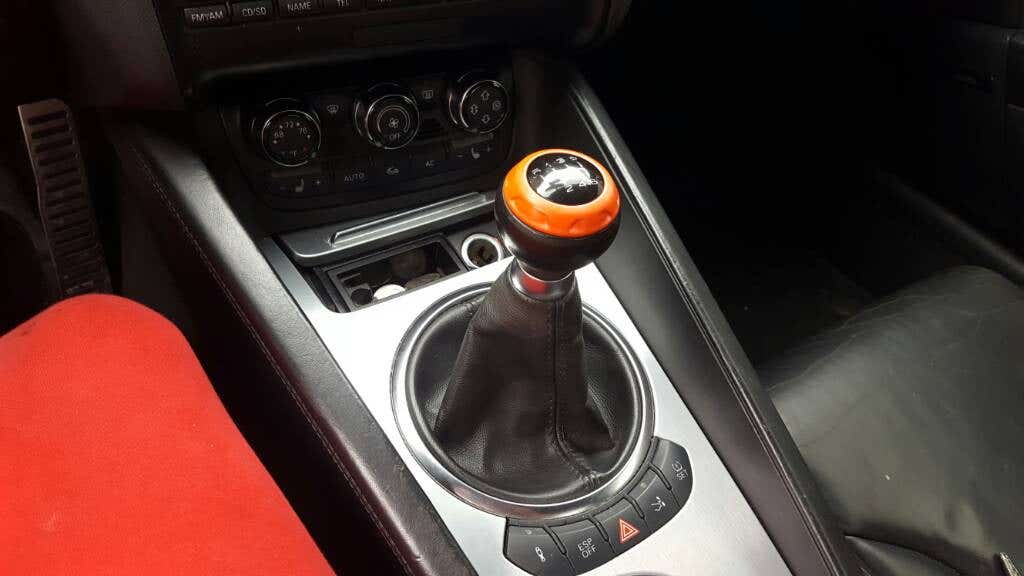
The boot is Punched Leather with Orange stitching. This is a Rally frame design with Orange bolts. Very high quality material was used for all of the parts.
![Image]()
![Image]()
![Image]()
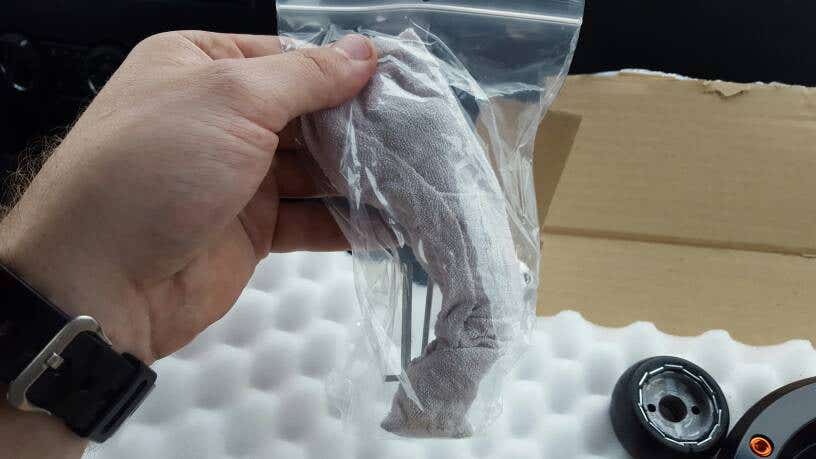
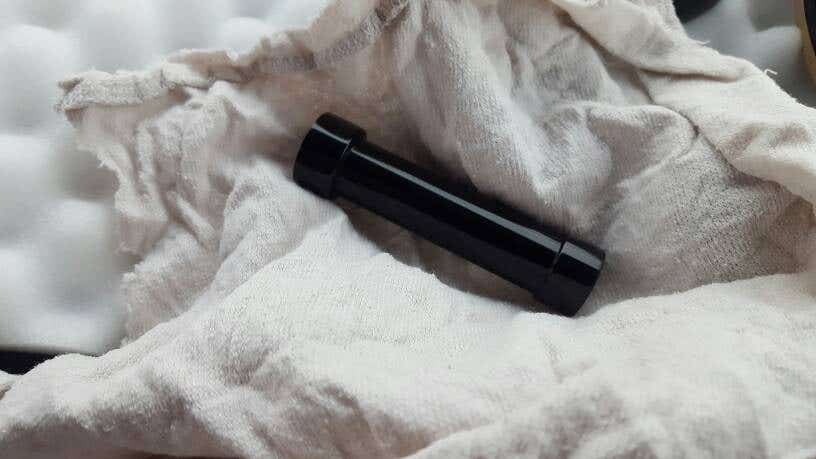
This bag holds the tools, and a part for the base of the stem of the shifter, which was carefully packed in cloth.
![Image]()
![Image]()
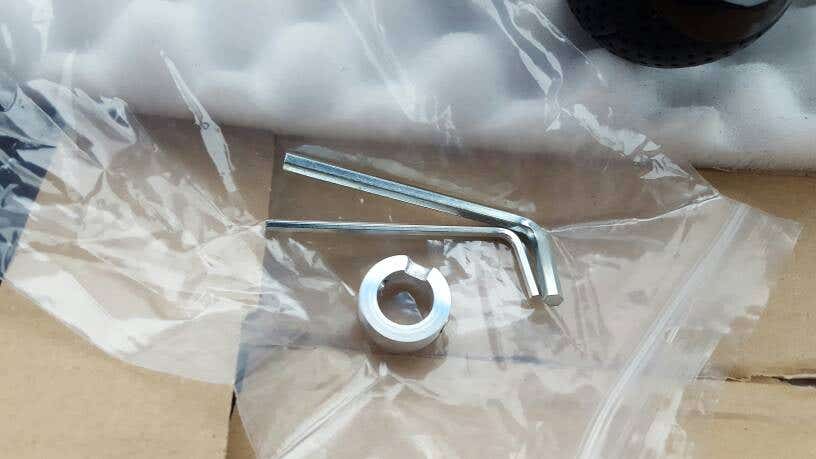
The entire kit came with all tools needed for the parts that came in the box.
![Image]()
Sorry for the lengthy post and stay tuned for the install!!
Here's the install as promised!
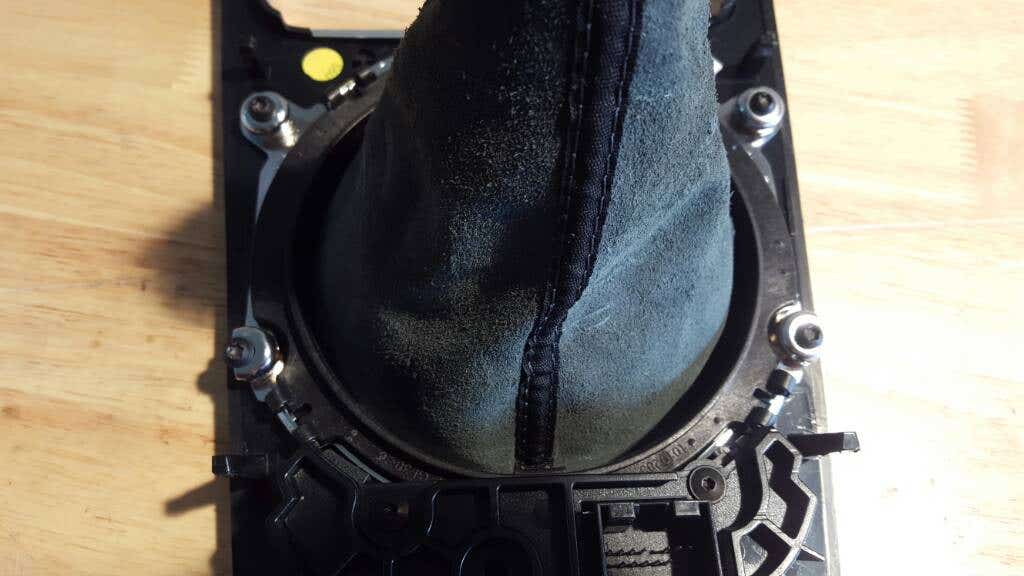
First, we remove the shift knob from the car and remove the 4 screws underneath. Follow the link to remove the console trim.
http://www.ttforum.co.uk/forum/viewtopic.php?f=43&t=332554&p=2593374&hilit=knob#p2593374
![Image]()
![Image]()
![Image]()
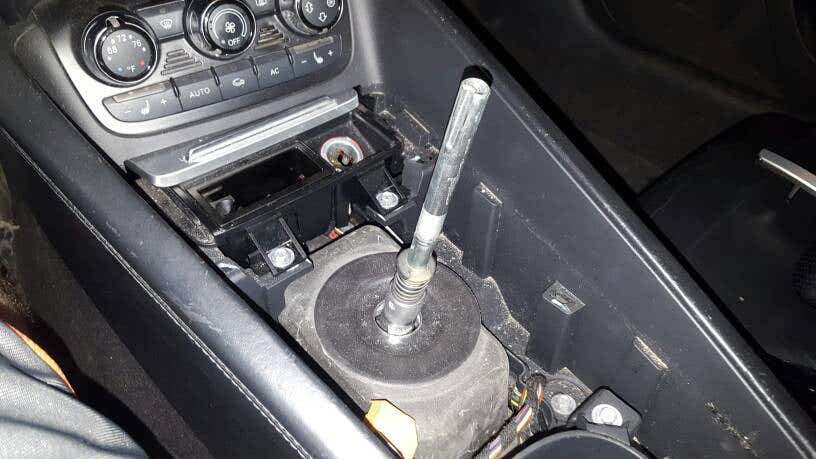
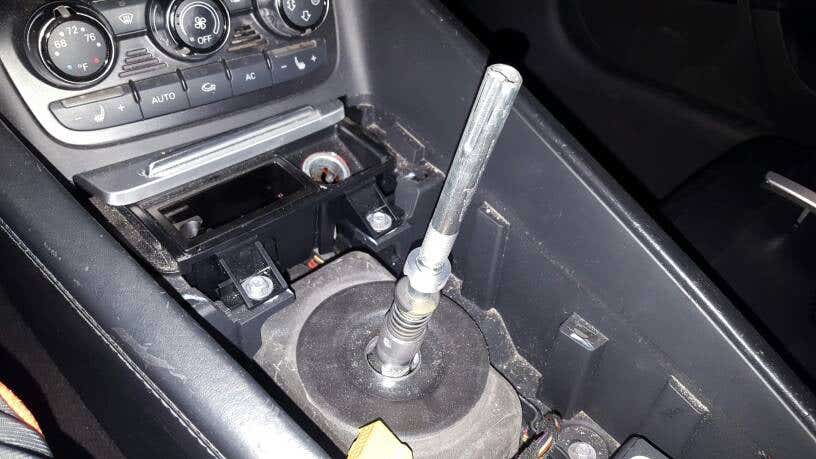
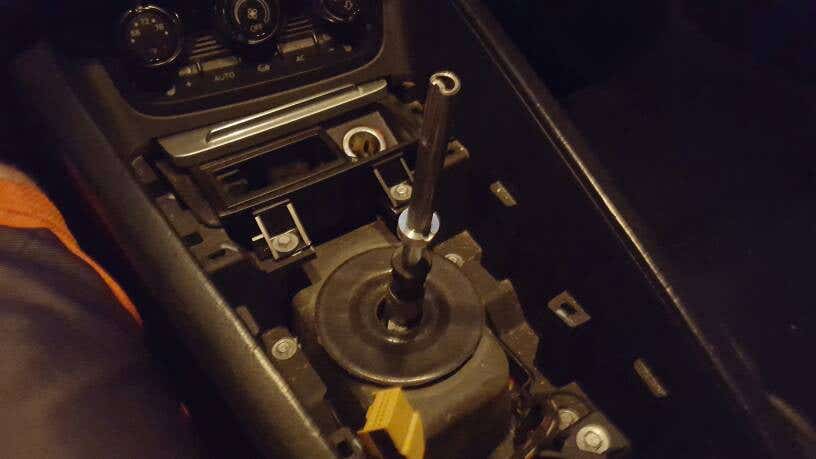
The new part has clips underneath that hold it in place. Simply loosen them and it fits perfectly in place and tighten them again.
![Image]()
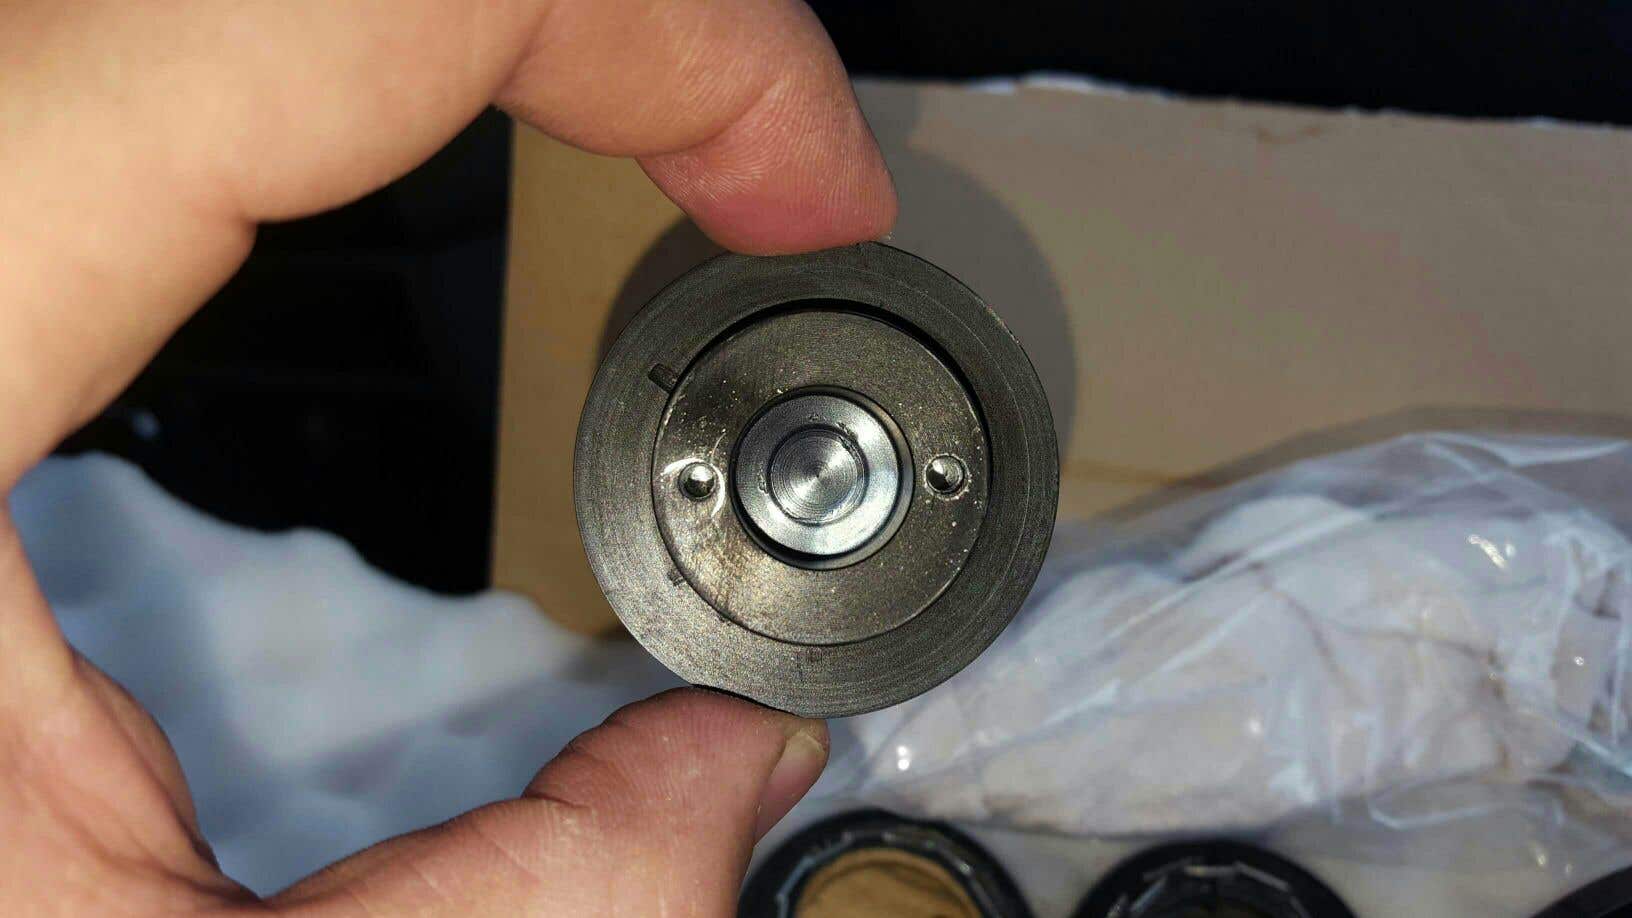
Then, the next step is where you can get creative and make the whole knob personalized, you take the small silver circle and slip it on the metal pin. Adjust it to whatever height you desire!! Use the smaller provided key to tighten it in place.
I chose the first, which is as low as possible (I also have a short throw shifter so it doesn't make sense to move it up). The second is about an inch higher and still works.
![Image]()
![Image]()
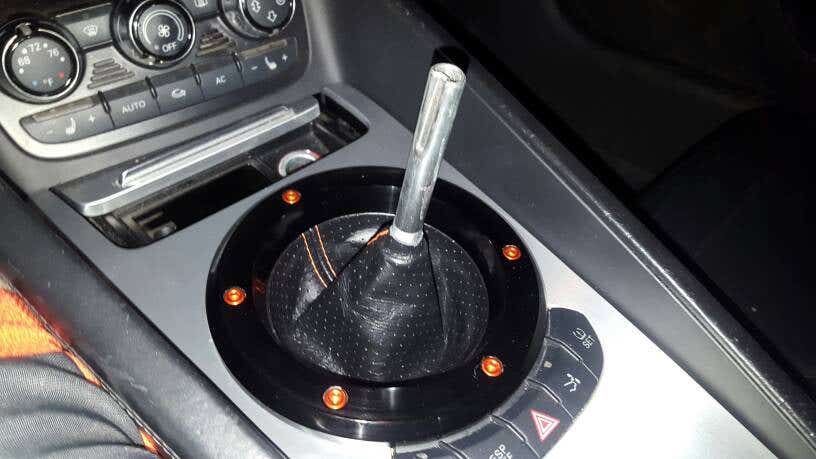
The next part is to slip the boot over and do not forget to plug it in!
![Image]()
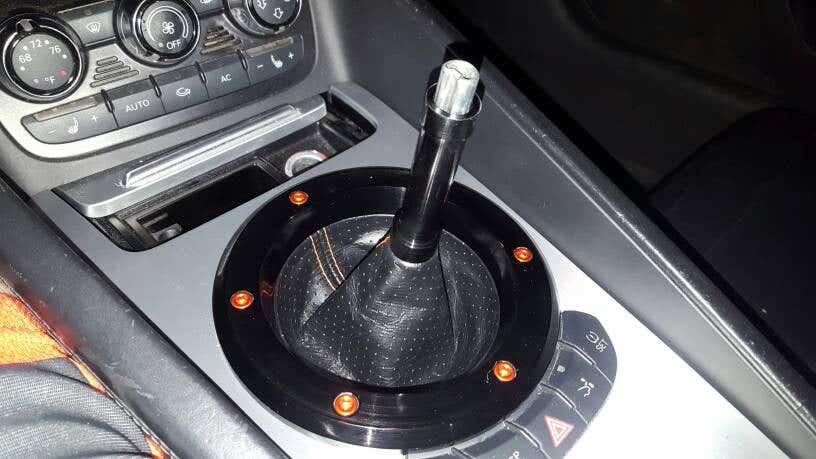
The black piece fits only 1 way. One side is smaller, the other is larger. The larger side goes downwards as the smaller side fits inside the knob itself.
![Image]()
The final bit is to place the knob on top and tighten it, again using the smaller key.
![Image]()
Here is the before pic:
![Image]()
I asked for a light weight and a heavy knob, which was met with amazing precision. I asked for a custom engraving on the top "C'mon BMW" Roy sent me several options he made in AutoCad and I was very happy with the result.
I got a note from my local post office today that they missed me and it will be ready to pick up tomorrow. I say NAY! I hunted down my mailman and got the package today. Hehe
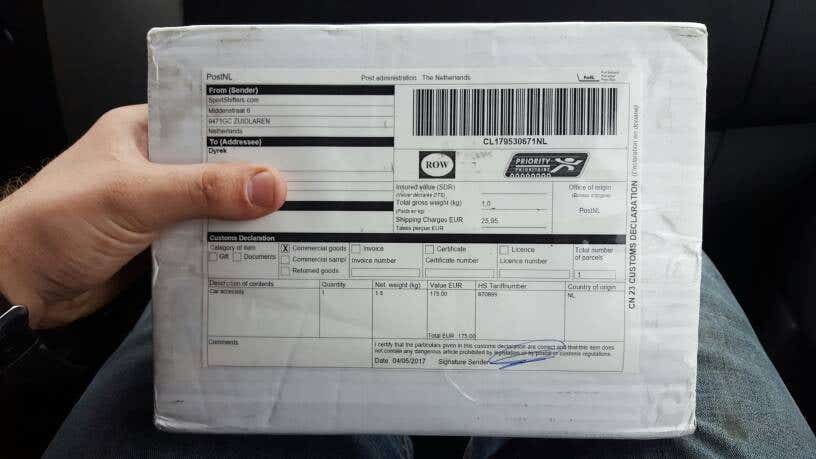
The packaging was very tight and secure.

When i opened it, i saw a little surprise!! Roy sent me extra weighted knobs!
I received the following: Perforated Leather (light), Punched Leather (medium), Perforated Suade (heavy), Perforated Ultrasuade (heavy).

One knob was completely assembled to show how to assemble additional knobs.
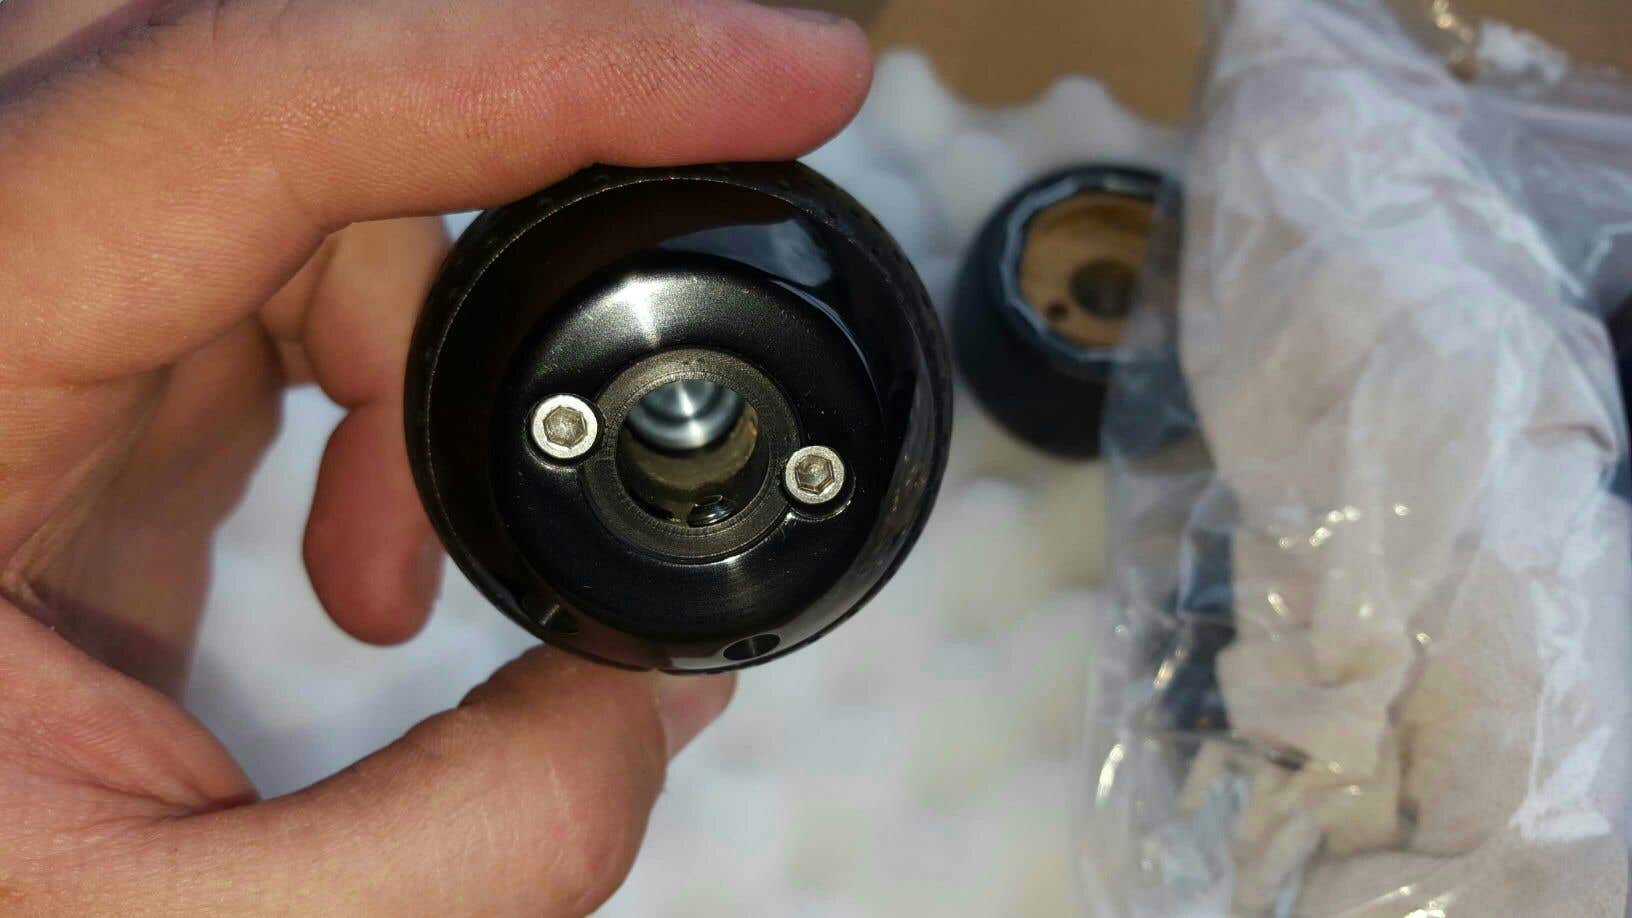
The shift pattern is held in place by bolts from underneath.
The boot is Punched Leather with Orange stitching. This is a Rally frame design with Orange bolts. Very high quality material was used for all of the parts.
This bag holds the tools, and a part for the base of the stem of the shifter, which was carefully packed in cloth.
The entire kit came with all tools needed for the parts that came in the box.
Sorry for the lengthy post and stay tuned for the install!!
Here's the install as promised!
First, we remove the shift knob from the car and remove the 4 screws underneath. Follow the link to remove the console trim.
http://www.ttforum.co.uk/forum/viewtopic.php?f=43&t=332554&p=2593374&hilit=knob#p2593374
The new part has clips underneath that hold it in place. Simply loosen them and it fits perfectly in place and tighten them again.

Then, the next step is where you can get creative and make the whole knob personalized, you take the small silver circle and slip it on the metal pin. Adjust it to whatever height you desire!! Use the smaller provided key to tighten it in place.
I chose the first, which is as low as possible (I also have a short throw shifter so it doesn't make sense to move it up). The second is about an inch higher and still works.
The next part is to slip the boot over and do not forget to plug it in!
The black piece fits only 1 way. One side is smaller, the other is larger. The larger side goes downwards as the smaller side fits inside the knob itself.
The final bit is to place the knob on top and tighten it, again using the smaller key.
Here is the before pic:
")


