

Edit: Due to the new forum layout I will no longer be able to edit this post moving forward.
Hopefully I will continue to post beyond the updates I have put below in this but you'll find anything 2022 onward past page 31 in the thread!
There are constant updates - At multi points thorughout the many pages in this thread, had been slacking so sometimes there is gaps.
Would be best if you've just stumbled apon this, to read through, all the pages of my rambling as there is many more regular/small updates throughout - Sorry!
Timeline for the first have of this original post is backwards...
Latest first so you can see a brief over view of the cars stages over the years I have owned it, but there is much more throughout the thread.
Then after these brief snip-its of spec, it goes back to is where it all began - in a normal time layour moving forward not back
If you do, thank you for reading & hope you enjoy!
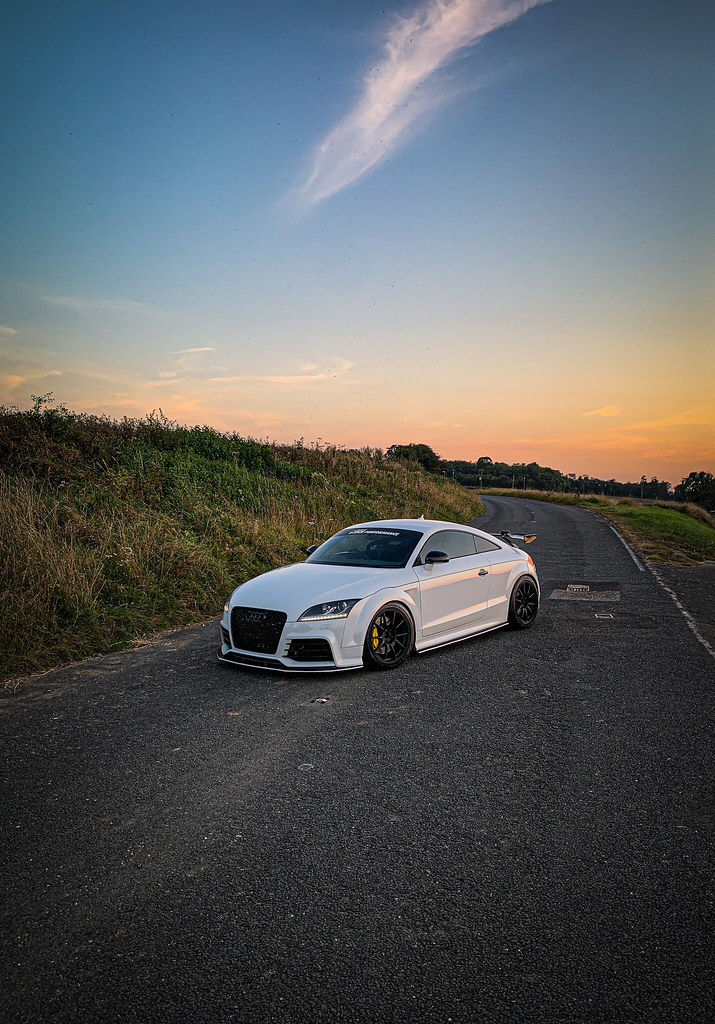
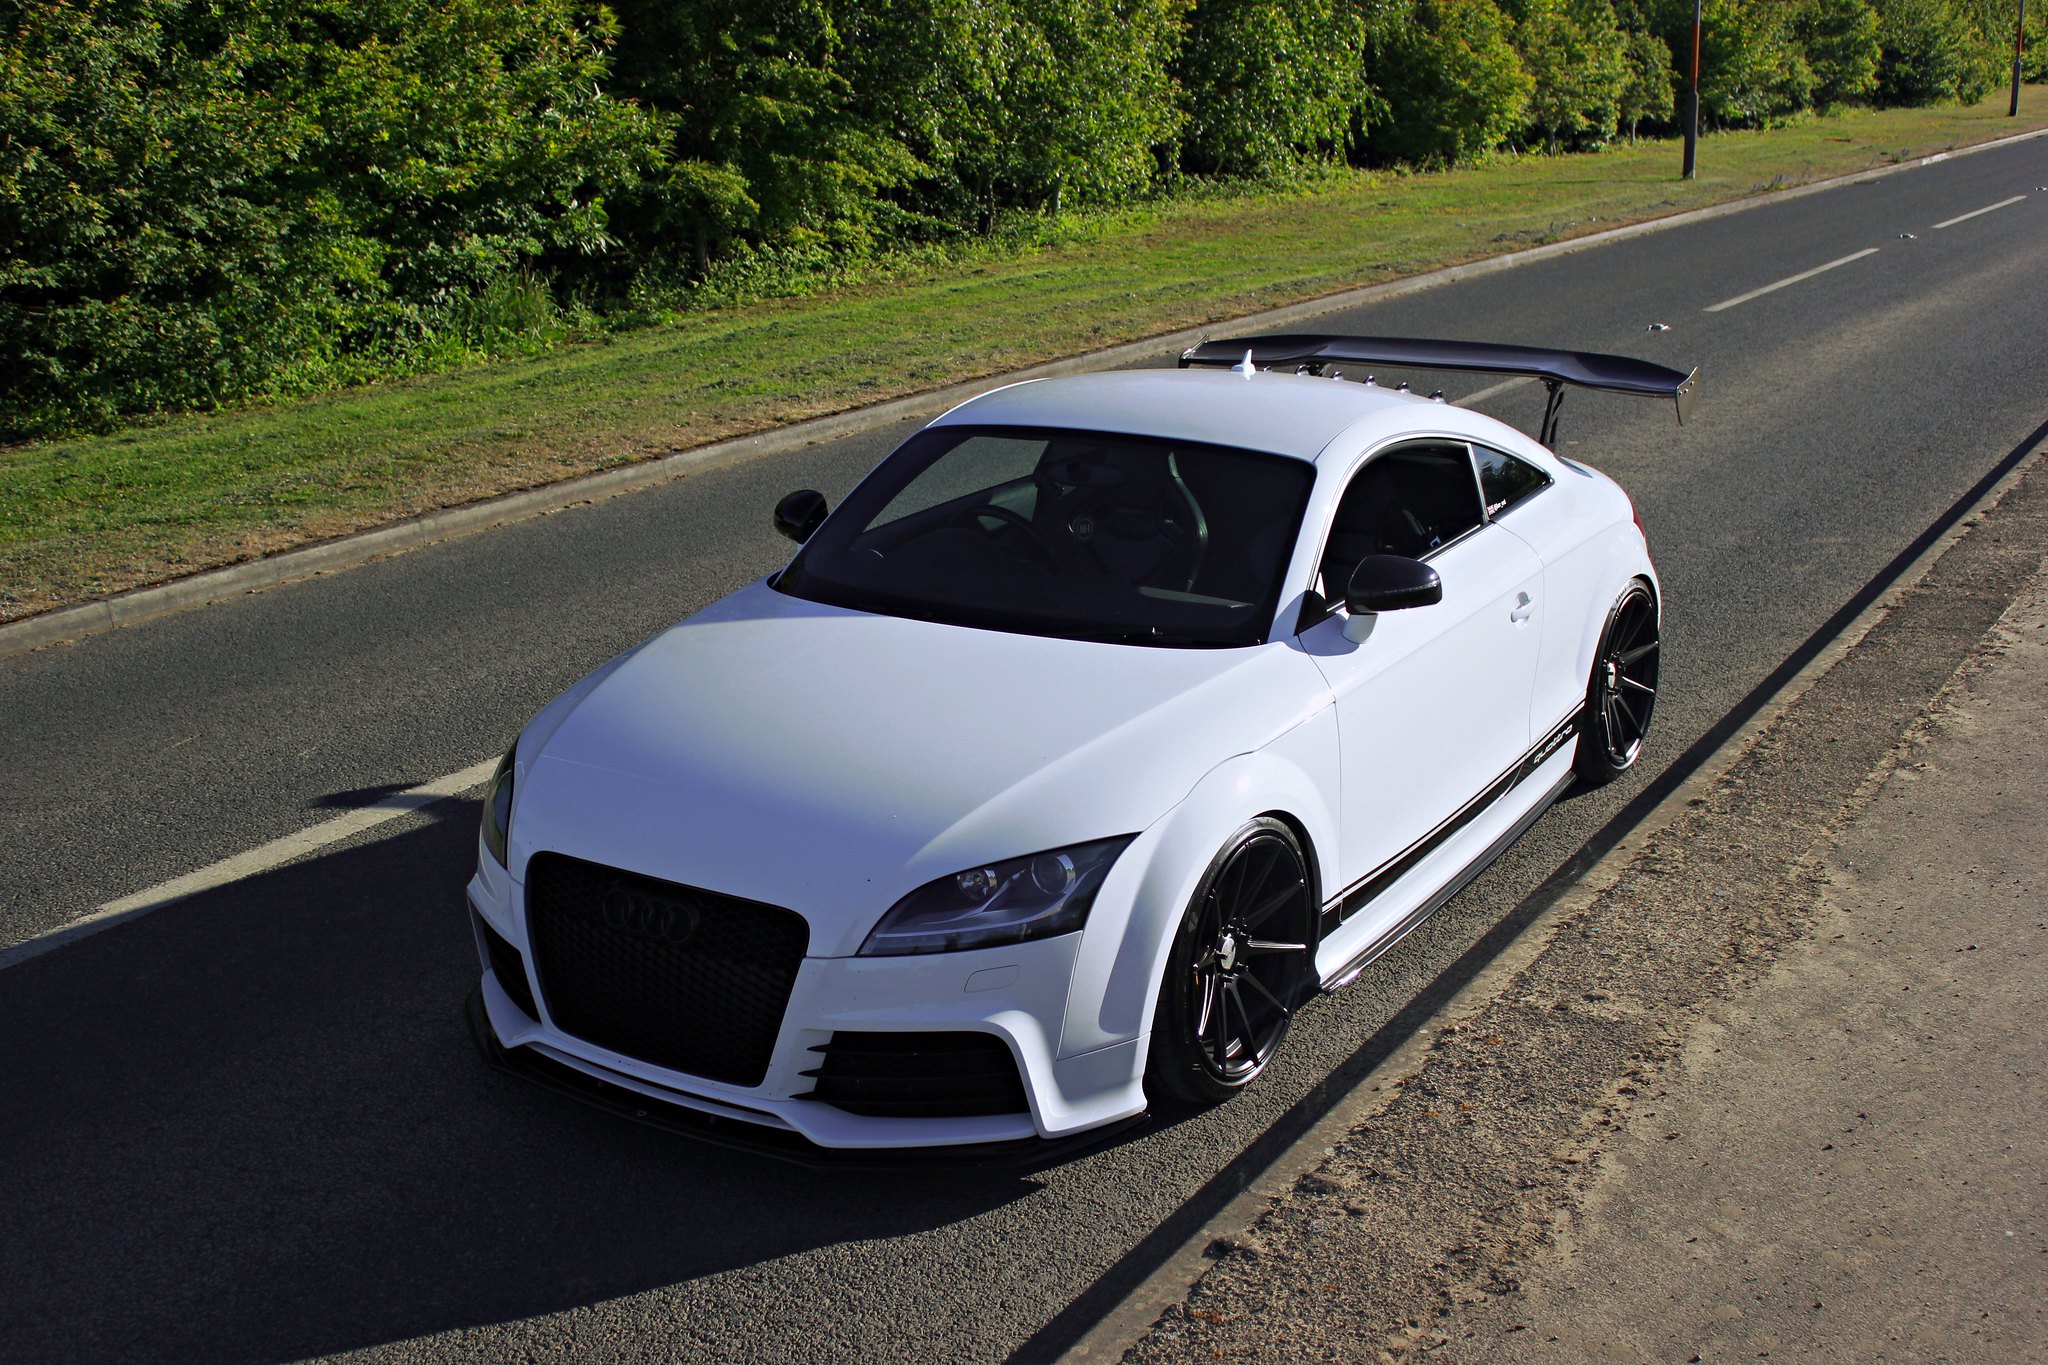
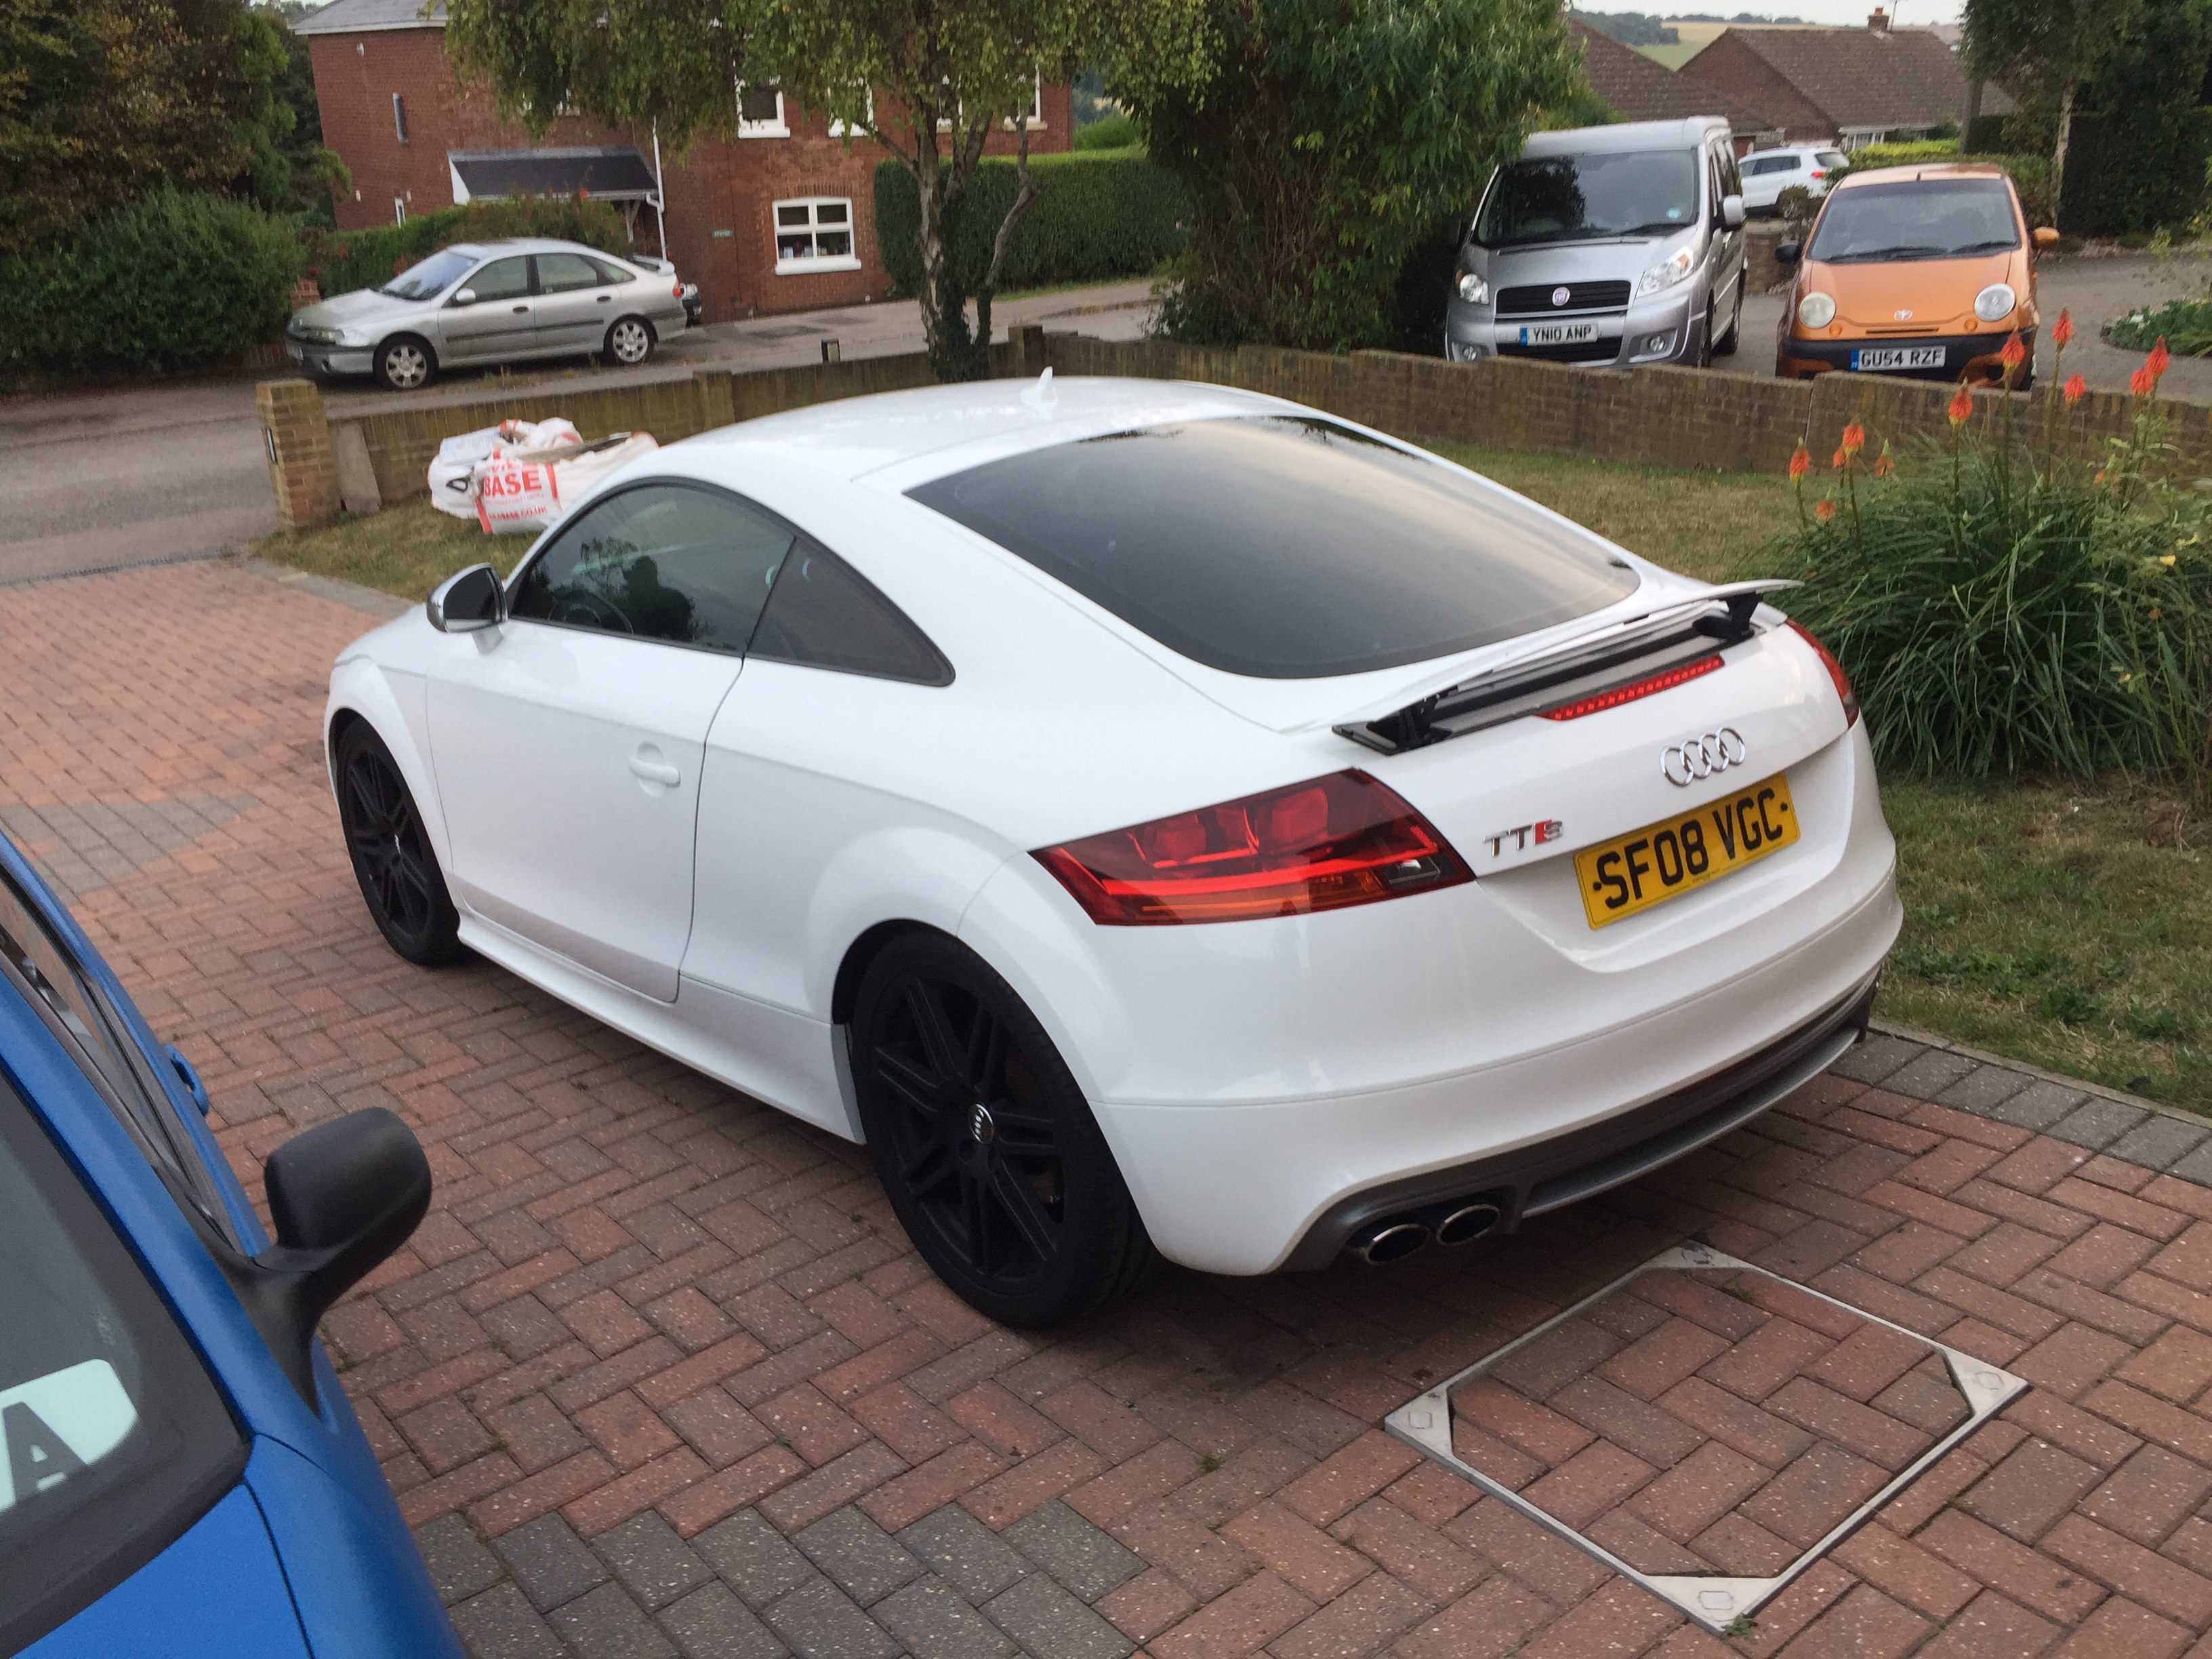
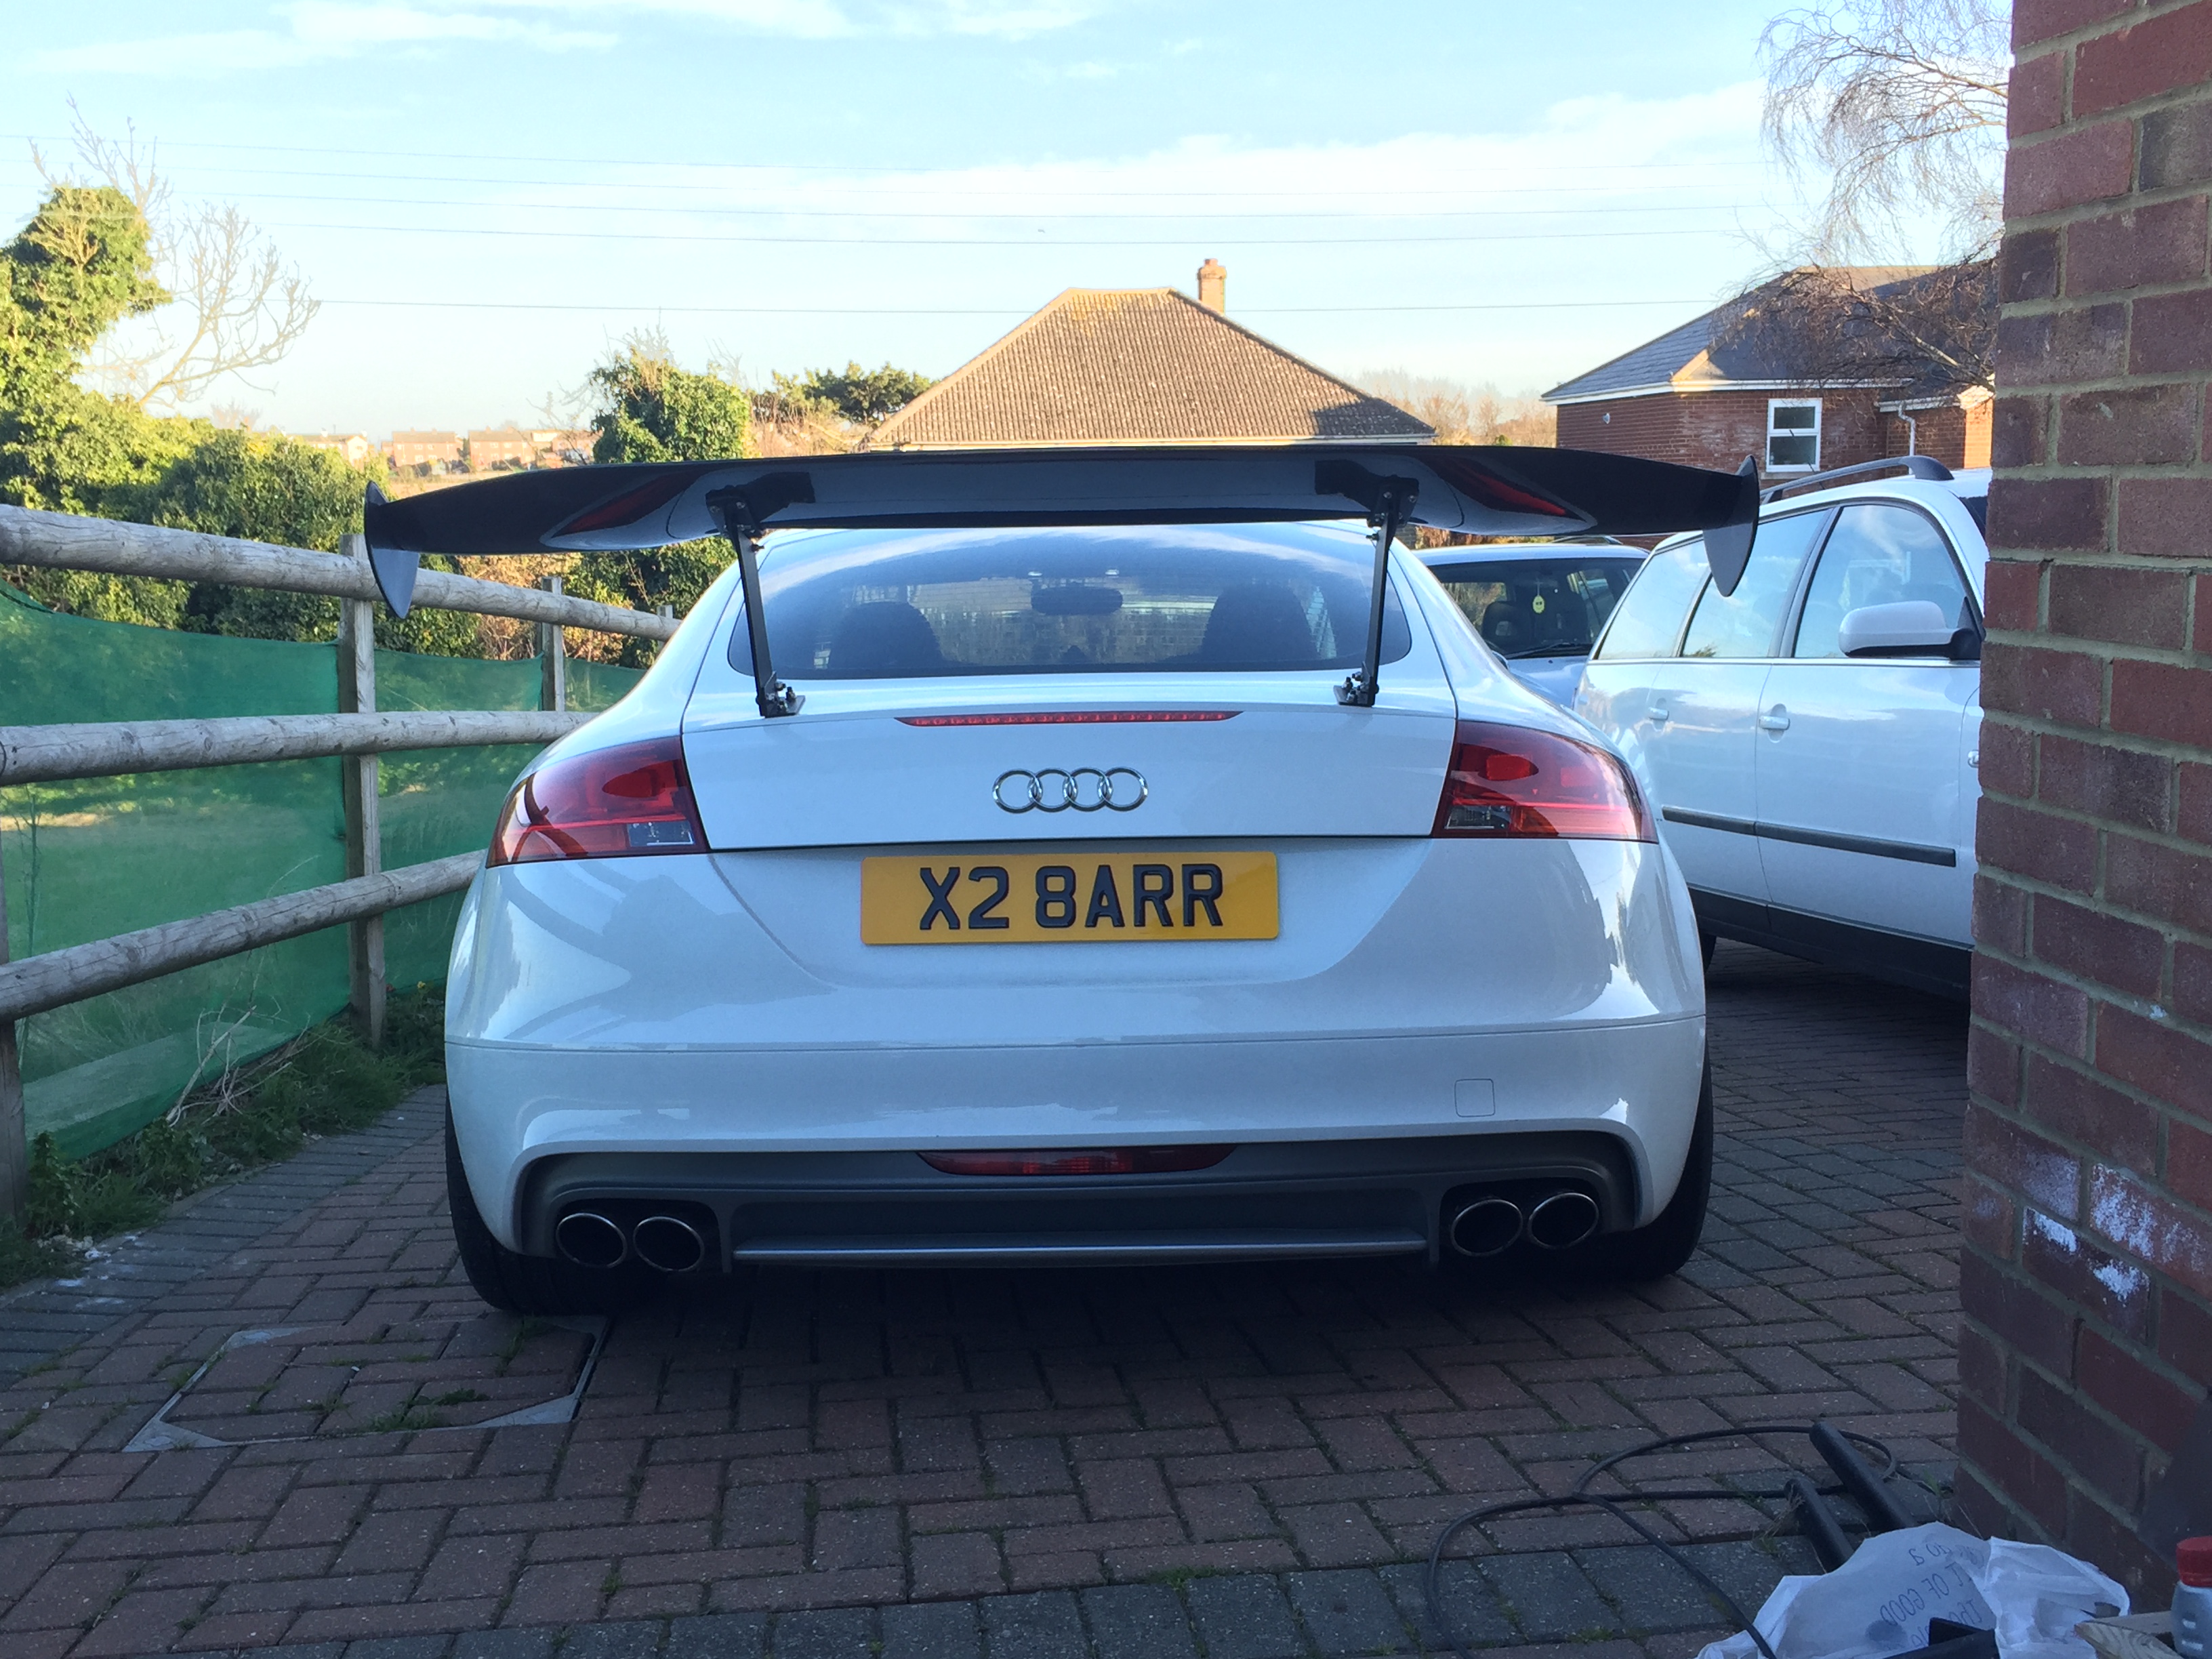
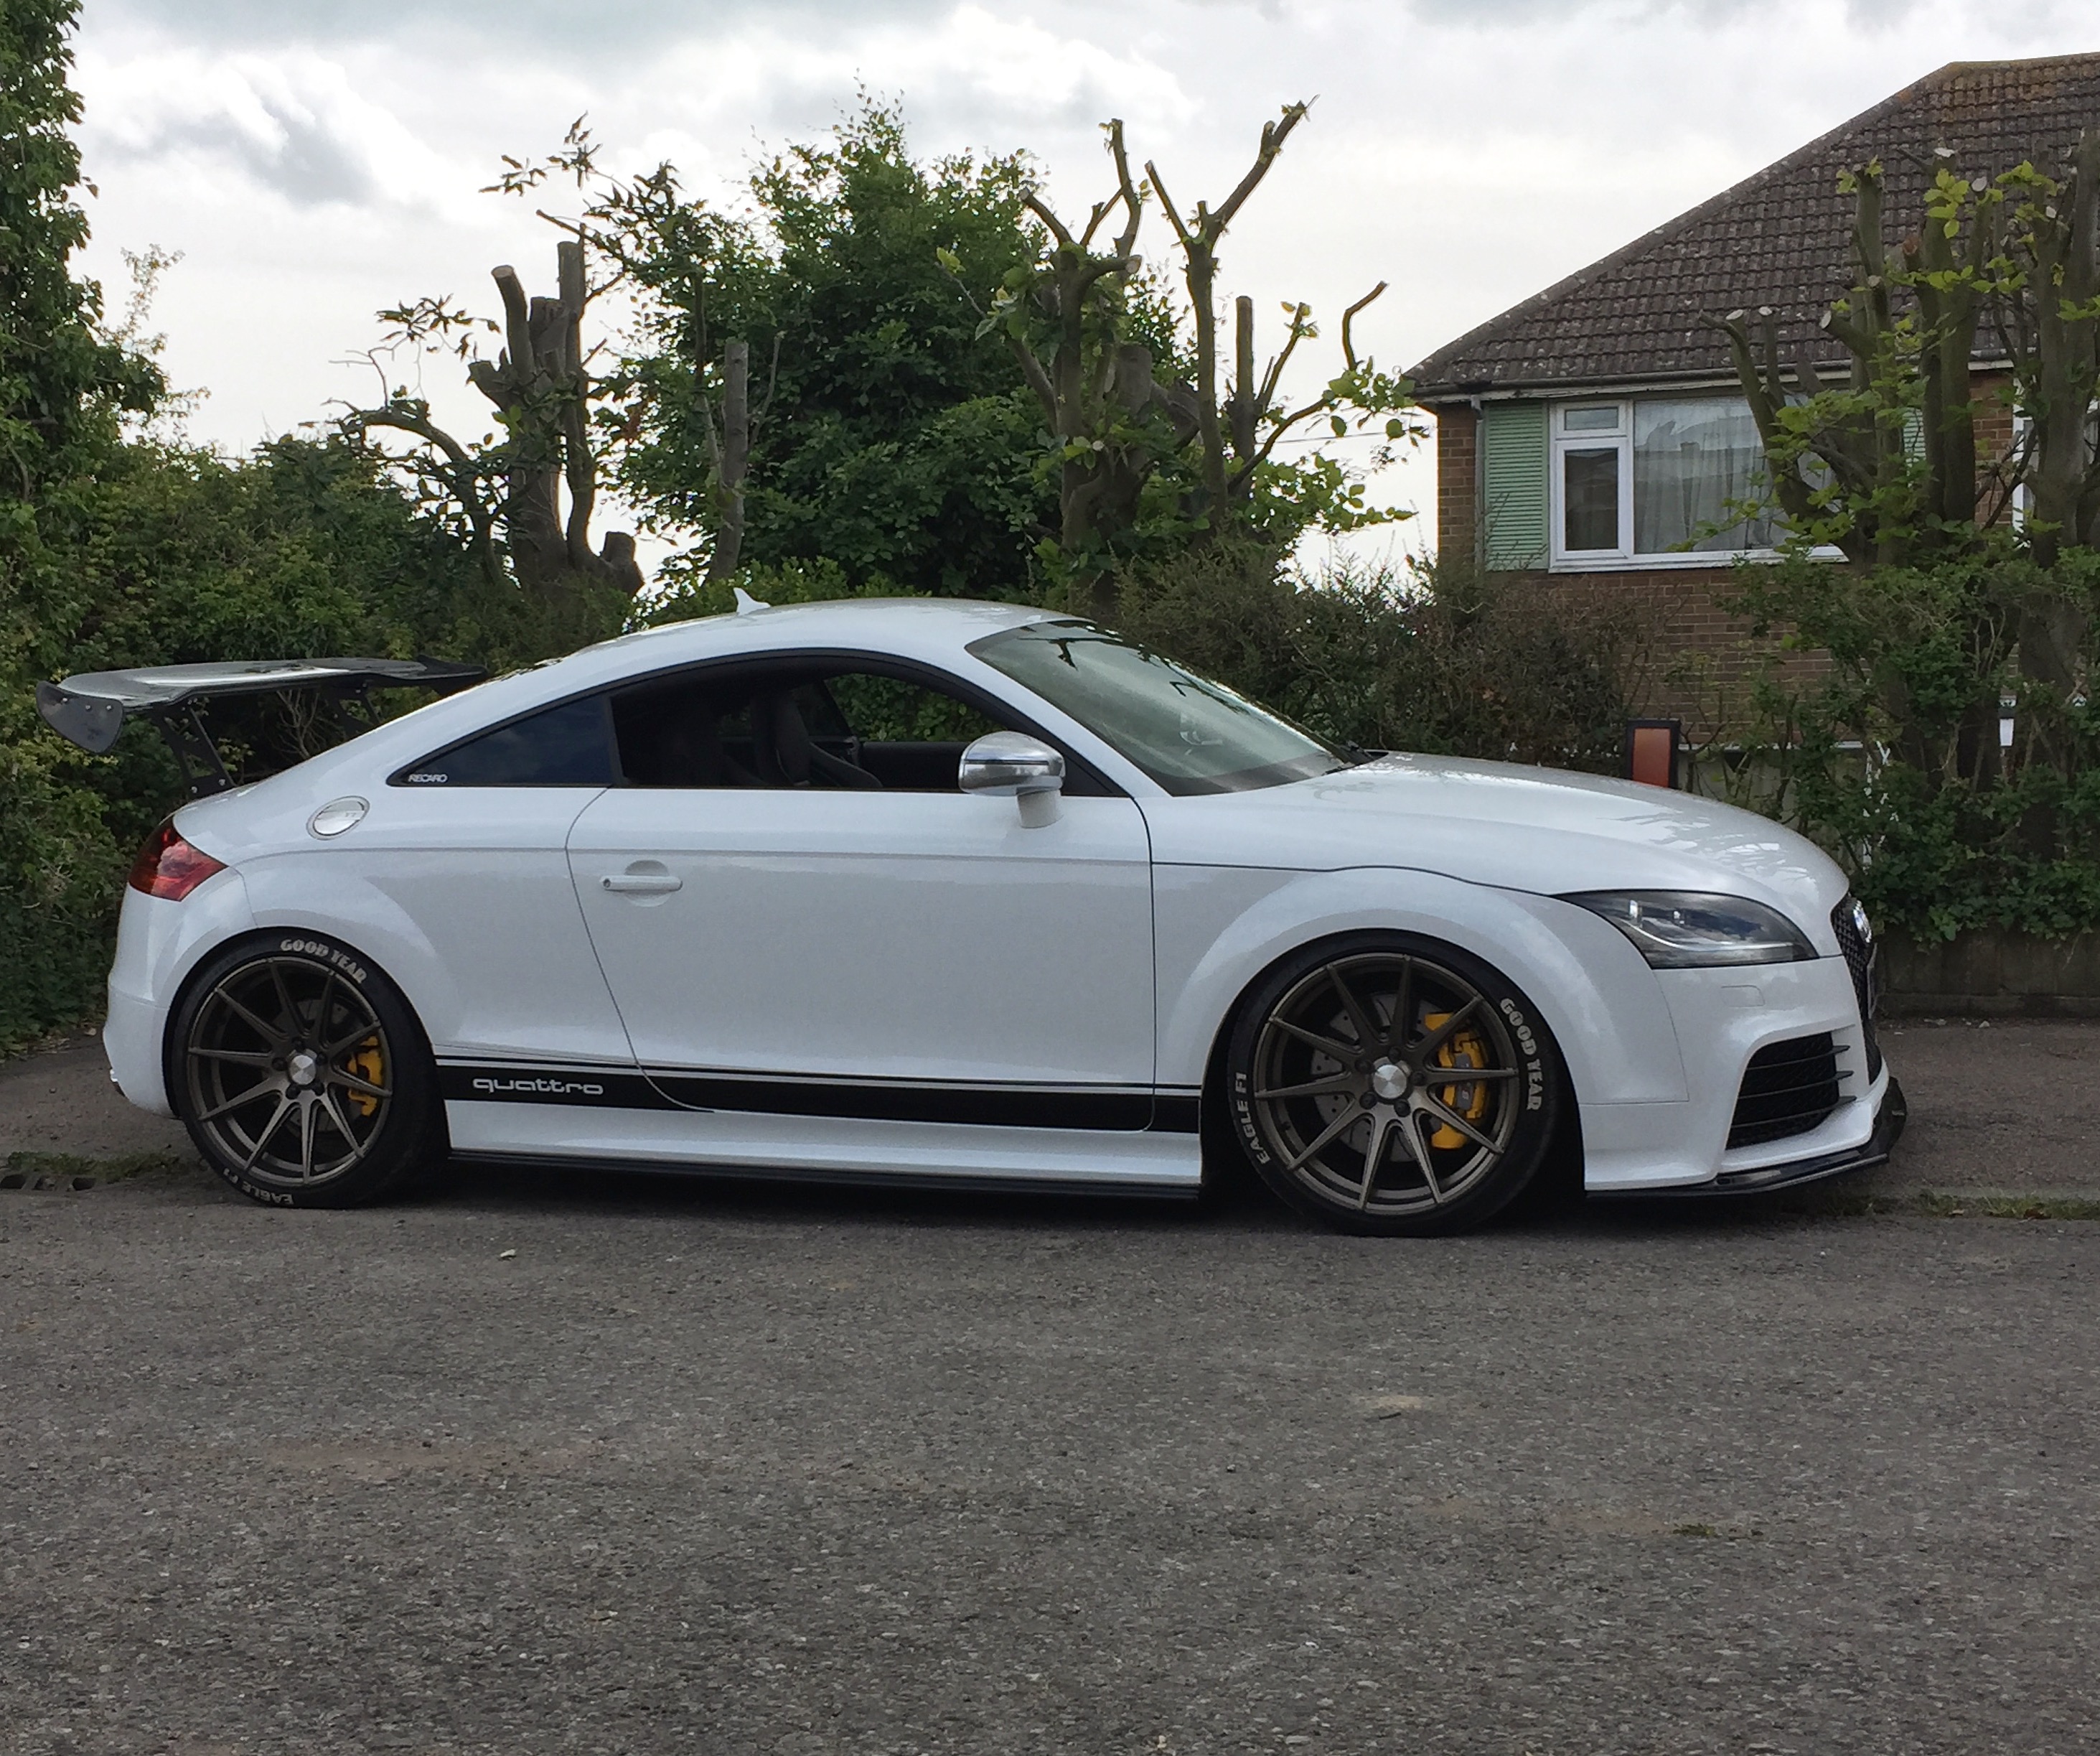
2021 updates have made this car really the best it has ever been, I am so pleased with it.
Now over 5 years & over 60k miles in this TTS, it's been amazing and I do love it far too much :lol:
So have the 2021 spec, then some photos!
Performance/chassis:
•3.5” trackslag downpipe + sportscat
•Milltek Catback exhaust (non-res)
•Toyosport intercooler & custom pipework + Murray clamps
•Hel performance Oil cooler
•Creation motorsport muffler delete & discharge pipe
•Forge silicone charge pipe joiner
•Loba high pressure fuel pump
•Custom pro-ram induction kit
•AEM meth injection kit
•OEM Rev G diverter
•Audi RS4 fuel pressure return valve
•AKS runner flap delete
•NGK Iridium BKR7EIX
•R8 coilpacks
•R-tech full PCV delete
•R-tech remap 'stage 2+' - stock ECU
•Helix organic clutch kit + DMF & braided clutch line
•Coolerworx shifter tower, Forge short shifter, WG relay shifter, Draft 42 shifter bushings & diesel geek runner bush
•Powerflex engine & dogmount inserts
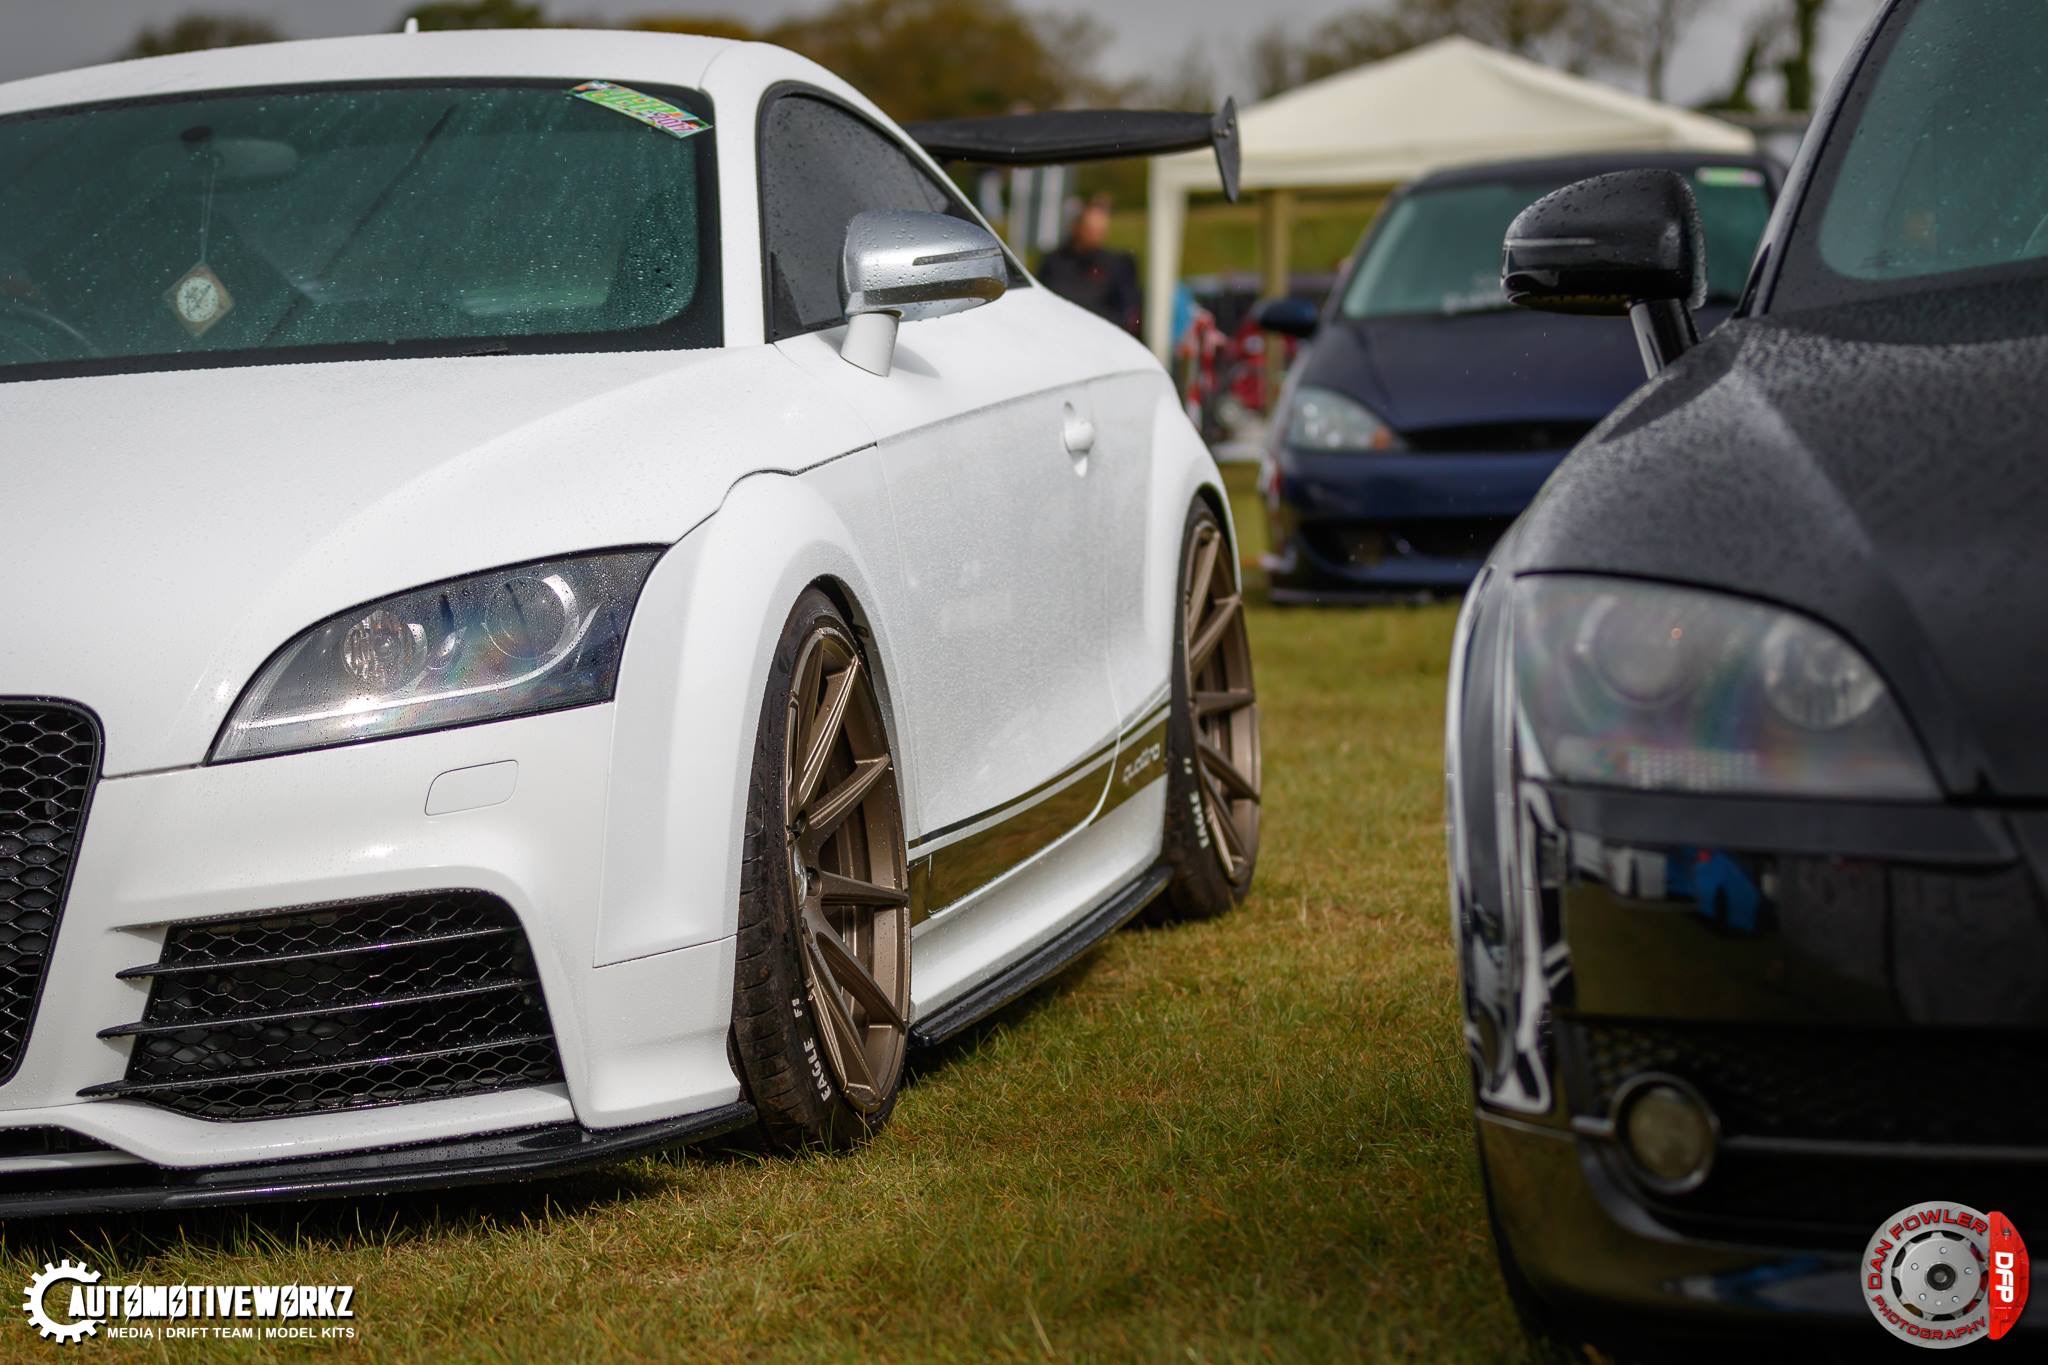
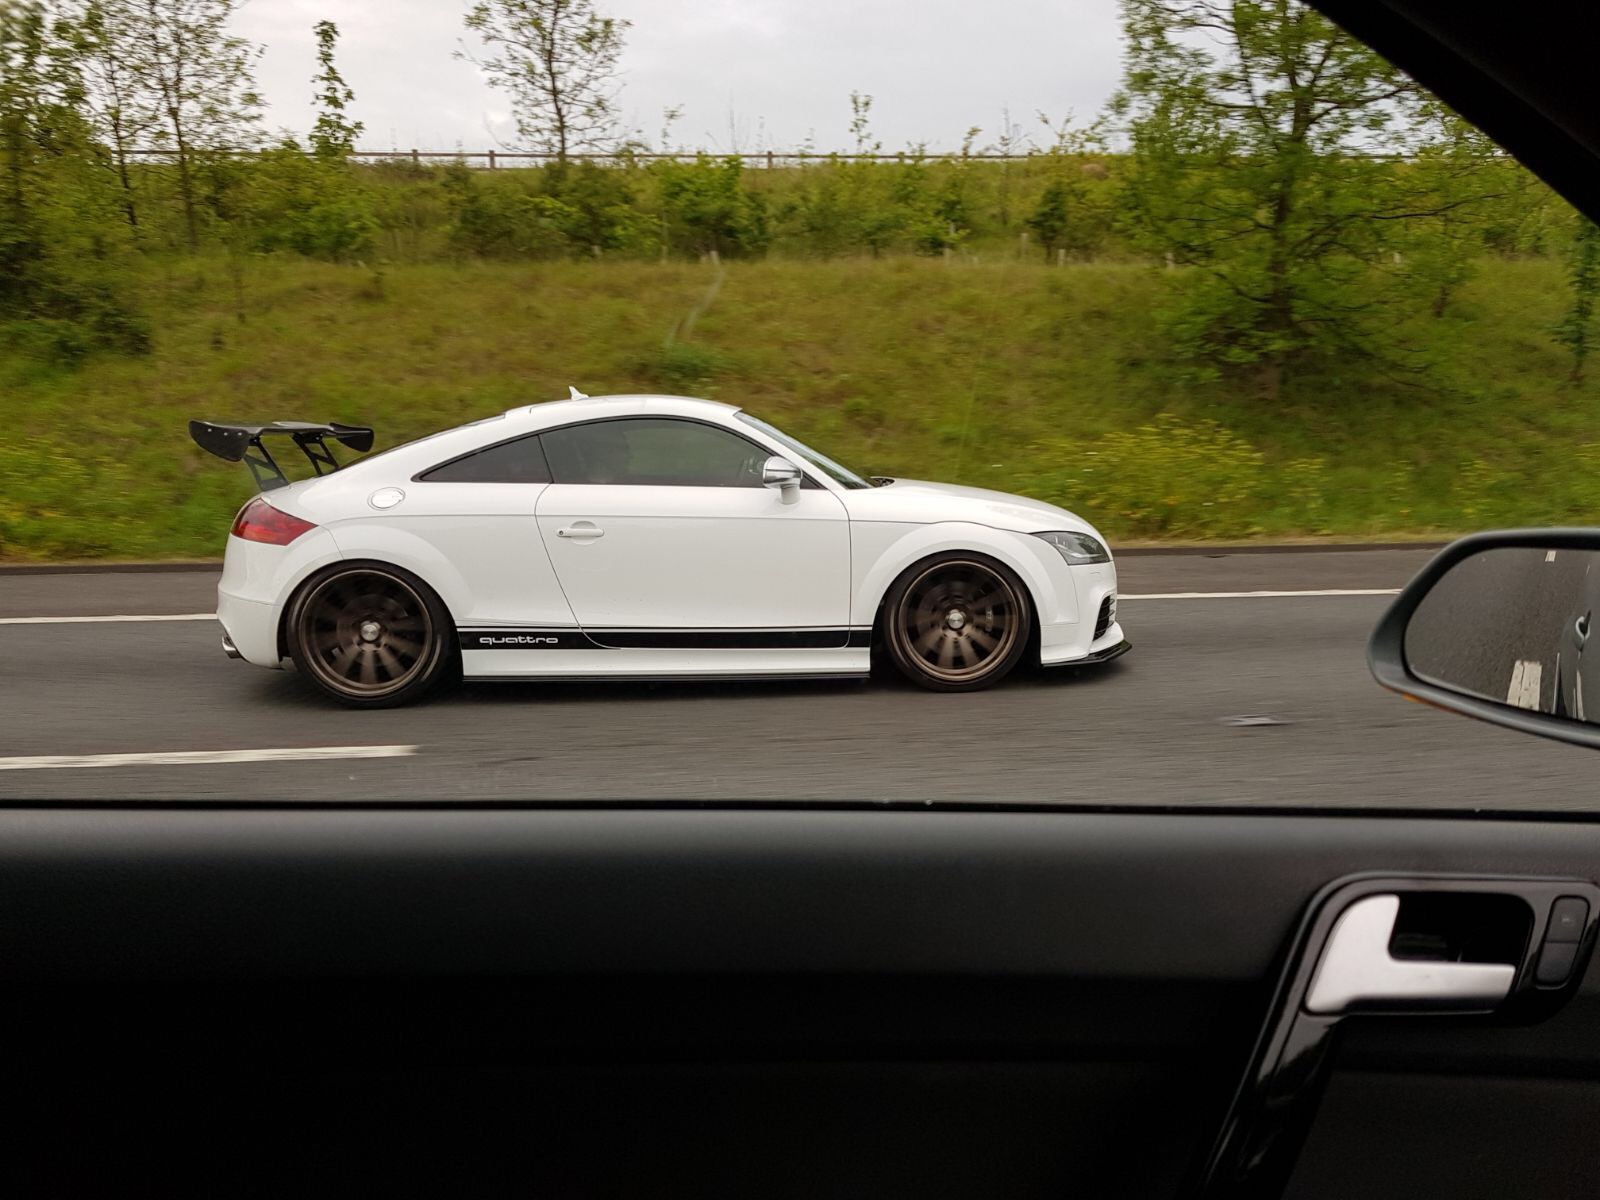
•Rota Titans 18” Wheels + Goodyear Supersports (road) & 1Form 18" Wheels + Yokohama AD08Rs (track)
•Yellowspeed racing/Intermotiv custom coilovers
•Cloude9 magride delete modules
•Superpro Antilift Kit & front polybushes
•Tyrol subframe locking kit
•Whitline Rear anti-roll bar & links
•Ultraracing front strut bar
•TTRS brake calipers, CL RC5+ or RC6 pads, braided brake hoses & Tarox fluid
•Genuine Audi TTRS lower inner & modified vented arch liners
Exterior:
•Genuine Audi TTRS front bumper and black edition grill
•Custom vented front wings
•Fibreglass rear vented bumper + custom fog/rainlight
•Maxton designs splitter & side skirts
•Mk3 performance Carbon fibre spoiler
•Carbon fibre ~ door handles, front bumper insert, mirror blanks
•Dynamic mirror lenses
•Custom 4” carbon exhaust tips
•Custom front & rear tow eyes
•Black badges
Interior:
•Corbeau Revolution XL seats, alloy sidemounts & sliders
•Retrofitted OEM heated seat pads
•TRS 3 inch ultralight harnesses
•Cloude9 seat bases
•Cloude9 rear seat delete & net
•All rear boot panels retrimmed
•SW Motorsport cage
•Alpine X802D-U 8” headunit
•Focal audio speakers & tweeters
•Cloude9 vent adaptor
•Stack boost gauge
•Audi 8V S3 heater vents
•Liquid digital gauge
•All interior red illumination changed to white
•All bulbs to LED & double boot light
•Carbon fibre ~ centre console, glove box trim, grab handles, pull handles, interior mirror, clock besile, hand brake
![Image]()
![Image]()
![Image]()
![Image]()
![Image]()
![Image]()
![Image]()
![Image]()
![Image]()
![Image]()
![Image]()
![Image]()
![Image]()
![Image]()
![Image]()
![Image]()
![Image]()
![Image]()
![Image]()
![Image]()
![Image]()
2020 saw a huge change to the car.
Also marked 4 years with this car and 50k miles in it. Must say it's been brilliant.
2020 Spec & Photos...
Performance/chassis:
•3.5" trackslag downpipe + sportscat
•Milltek Catback exhaust (non-res)
•Toyosport intercooler & custom pipework
•Hel performance Oil cooler
•Creation motorsport muffler delete & discharge pipe
•Loba high pressure fuel pump
•Custom pro-ram induction kit
•AEM meth injection kit
•Forge recirc valve
•Audi RS4 fuel pressure return valve
•AKS runner flap delete
•NGK Iridium BKR7EIX
•R-tech remap - stock ECU
•Helix organic clutch & braided clutch line
•Coolerworx shifter tower, Forge short shifter, WG relay shifter, Draft 42 shifter bushings & diesel geek runner bush
•Cloude9 oil catch can kit
•Powerflex engine & dogmount inserts
•2Forge ZF5 18" Wheels
•Yellowspeed racing/Intermotiv custom coilovers
•KW magride delete modules
•Superpro Antilift Kit & polybushes
•Tyrol subframe locking kit
•Whitline Rear anti-roll bar & links
•Ultraracing front strut bar
•TTRS brake calipers, Tarox 2 piece discs, CL RC6 pads & braided brake hoses
•Genuine Audi TTRS inner arch liners & tubed brake cooling ducts
Exteriror:
•Genuine Audi TTRS front bumper and black edition grill
•Custom vented front wings
•Custom rear diffuser & rain light
•Maxton designs splitter & side skirts
•TTRS Carbon fibre spoiler
•Carbon fibre ~ petrol cap, mirror caps, front TTS emblem, door handles, front bumper insert
•Custom 4" exhaust tips
•Black badges
Interior:
•Motamec Evo-One seats, alloy sidemounts & sliders
•Cloude9 seat bases
•Cloude9 rear seat delete & net
•Cloude9 harness bar
•Cloude9 vent adaptor
•Stack boost gauge
•TRS 3 inch harnesses
•Euro Impulse gearknob
•Audi 8V S3 heater vents
•Liquid digital gauge
•Carbon fibre ~ centre console, glove box trim, grab handles, pull handles, interior mirror, clock besile, hand brake & magic tree
![Image]()
![Image]()
![Image]()
![Image]()
![Image]()
![Image]()
![Image]()
![Image]()
![Image]()
![Image]()
![Image]()
![Image]()
![Image]()
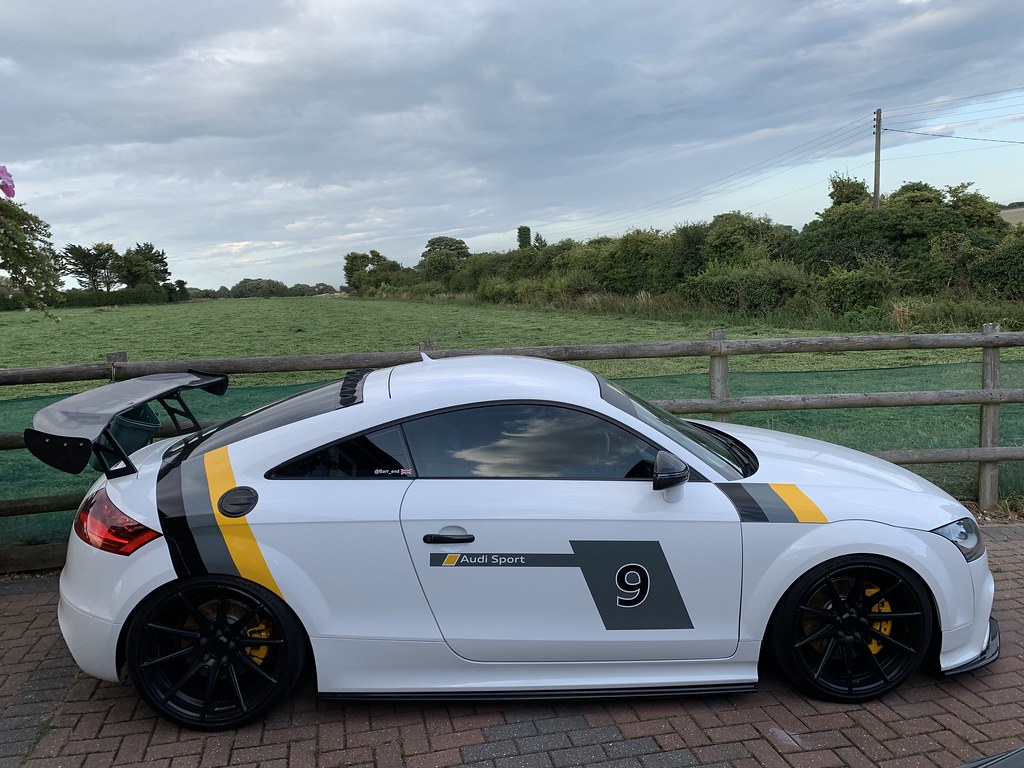
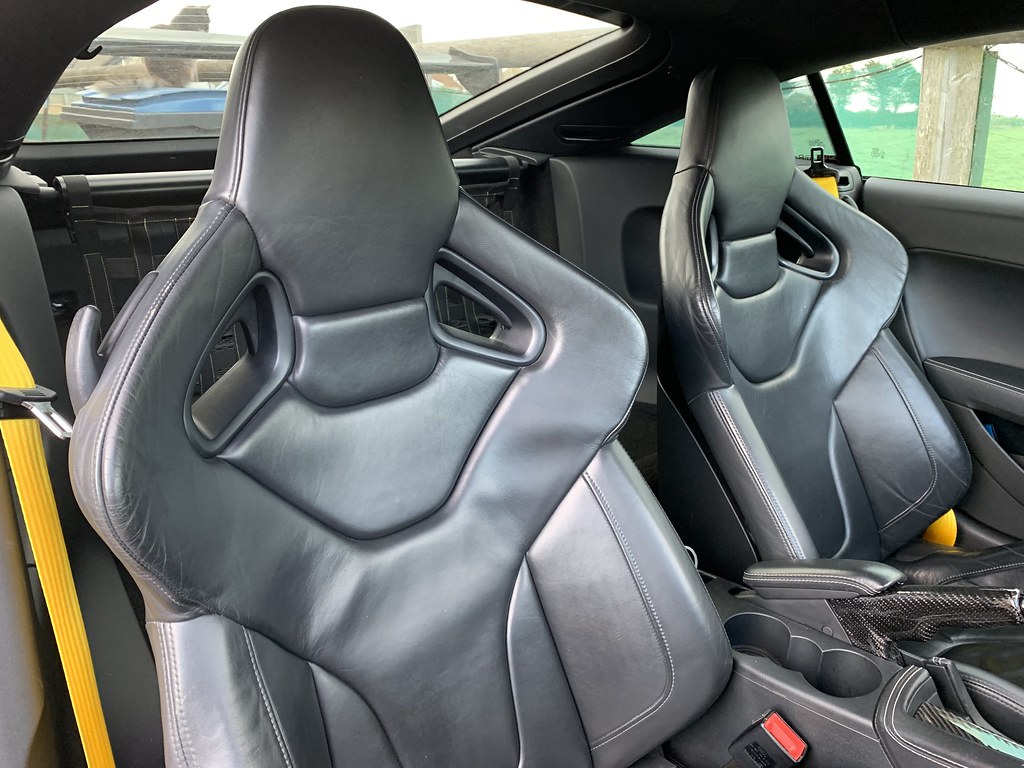
Here's just a few photos of updates, and spec list of 2019 - many more updates have happened since
Recaro Wingback bucket seats (optional factory extra)
Audi RSNE head unit (optional factory extra) & retrofitted AMI
Cloude 9 customs rear seat delete, bar & net - with yellow stitch to match yellow seat belts
Audi TTRS genuine front bumper and grills
Maxton designs splitter & side skirts
Custom made rear diffuser & exhaust tips
Japspeed Carbon fibre spoiler & custom uprights
Rear window Vortex generator
Window tints
Custom Audi sport Livery
Bola CSR 19 x 9.5" wheels
Mtech grooved discs, Brembo HP2000 sport pads & Hel braided brake hoses, ATE Typ2000 fluid
Yellowspeed Club performance coilovers
Superpro Antilift Kit & front wishbone polybushes
Tyrol subframe locking kit
Helix organic clutch & AKS braided clutch line
Forge short shifter, Draft42 shifter end link bushes, OEM metal relay shifter, Diesel geek slider
GFB DV+ valve
Custom Ramair induction
Milltek Full exhaust - 100 cell race cat & non-res
Toyosport intercooler (600x300x76mm plate & bar core)
2.5" custom pipework into modified creation motorsport charge & discharge pipes with turbo muffler
Loba HPFP (high pressure fuel pump)
Audi RS4 FPRV (fuel pressure return valve)
AKS runner flap delete
R-tech custom map - 380HP/410ftlbs
Carbon fibre - Interior:
Centre console, Glove box trim, Grab handles, Pull handles, Mirror surround, Cluster/clock bezel, Steering wheel, Gearknob, Hand brake, dash ends.
Carbon fibre - Exterior:
Petrol cap, Wing mirrors, Door handles, Front bumper lip, TTS front emblem
![Image]()
![Image]()
![Image]()
![Image]()
![Image]()
![Image]()
![Image]()
![Image]()
![Image]()
![Image]()
![Image]()
![Image]()
2018 updates will be on the later pages from 10 onward - This is where car took some serious changes for the better and where it went from good too decent.
After posting the recent look of my TTS I got asked to make a build thread and thought f**k it, might as well. If this isn't in the correct section could an Admin please move it though as I had no idea where to sling it. I have done a fair amount to my TT since I bought it back in September. A lot will probably dislike many, but one thing in particular about my car bur I built it for me and I can honestly say I love it
So before my TTS I owned my polo GTI for 2.5 years, done a hell of a lot to it mainly all myself, but I won't go on about, just a few pictures..
![Image]()
![Image]()
![Image]()
As you can see I went pretty far with it, not only cosmetic but also a lot of engine and chassis work done. I wish now I could of kept it, but I had no space and at 23 I can't afford to run, insure and modify 2 cars. So once only a week or so after buying my TTS the polo got stripped for parts and scrapped
![Image]()
![Image]()
![Image]()
![Image]()
![Image]()
Here's how I got the TTS, however with some nice extras, heated Recaro wingbacks :mrgreen: and uprated 2010? satnav with the gloss surround and media button. However, have and AUX port, which doesn't work, rewired the wires into the 32? wire plug as seen in a thread and activated it a vag-com but still nothing. So if someone could shed some light please PM me!
Other than this it was relatively standard minus the rs rep grill still with the badge [smiley=bomb.gif], however was clear that the previous owners weren't ones to spend money once buying the car, had some rep wheels, cheap as chips Teflon tyres and what looked like brand new brakes but they were warped, felt over 50-60 with heavy breaking. Although these slight issues, I was still massively happy, and as much as I loved the polo, there was no comparison on driving feel and interior spec, a whole other league. First couple of things I did was just change few odds and sods with my vag com just to make it exactly what I wanted with what you can code in through it. Also got my plate onto the car pretty quickly too.
![Image]()
I tried to convince myself and others around me that I wasn't going to go silly and it was a decent car and wouldn't need me fiddling around with it, but who was I kidding :roll: Within 2 weeks of owning the car I was booked in with local vag tuner AMD. Car received a lot of parts there and this is the first time I had ever, literally ever let any garage touch any of my cars (minus tracking). I was a little nervous to say the least!
But once I picked up the car, I was more than relieved! So whilst in, had the Cambelt & pump done, forge short shifter, GFB DV+, forge induction kit and a milltek catback (regret not buying a full system and to be fair maybe even choosing the milltek). Asked for a quick test drive before handing over the money and it was brilliant! New intake and DV+ give a lovely turbo flutter on partial throttle up to 4k and past that a nice grunt from the engine whilst feeling much quicker. At the time I hadn't even cared about the exhaust note I was too much of a child, lightly putting my foot down to keep changing gear. But was presently surprised on the drive home with no drone what so ever even after speccing the non-res which from research people said was loud and awful. Anyways the car made a healthy 316BHP/333Ftlbs so I was well chuffed.
![Image]()
![Image]()
Next on the list was those awful tyres! They were scary enough in the dry but in the wet they were honestly death. My polo had 5.5 & 7.5 degrees of camber, with 9.5 wide wheels with 185/45 tyres and it drove better round corners in the wet than the TT could. They were shocking, the tyres had to go But I wasn't going to put some nice new rubber on nasty rep wheels, so I hunted all over the internet for wheel specs on the TT. Wheel spec and fitment for the polo I had become a right nerd so I knew what I was looking for just had to find out enough about the TT chassis/arches. Whilst doing this I took the car to Audi for the remainder of service items. I had my pants pulled down! £179 for an oil change after doing everything myself for the last 4 years knowing the cost of parts, I was shocked but wanted the stamp in the book. Along with the oil, the haldex which AMD couldn't do and Audi nicely enough fitted my 1 stage cooler plugs for free which I thought was a result. However after picking up my car and seeing the trip on 8mpg and 15-20 miles had been put on the car I wasn't impressed! Think after that and for the price I will just return to doing bits on the car myself. Atleast I know exactly what's happening.
![Image]()
![Image]()
![Image]()
In the end only a week after coming back from AMD I had these packages arrive. I went for 19 x 9.5 Bola CSR wheels all around, in bronze, which as the time I was sooo unsure on, but my misses convinced me. Also with some 245/35/19 Goodyear Asymmetric 3s to mount on them. Once I managed to get them bolted on, the doubts about bronze went. Women can be right about some things :lol: 😉
![Image]()
![Image]()
Also had a friend of mine run over the car with mop after some long hours cleaning and de-ironizing the car. The results speak for themselves, he managed to make white shiny!
![Image]()
Just after the mopping I received back the other part I had ordered when the car was at AMD. I managed to find a genuine RS spoiler and after a 2 week wait and a pretty poor job, I had it painted white. I bolted it on and was suddenly unsure if I was happy with it or not. Yes I know its not an RS, sorry if bolting an RS offends you, but as mentioned at 23, I can't afford an RS and I'm more than happy to bolt on the parts which I find enhance the car.
![Image]()
![Image]()
As much as I was happy with the new wheels, it highlighted, 2 major issues though. The awful arch gap and the poorly looking brakes. Luckily I had 80% of the brakes covered. With some right fitting (rounded bolts and rust) I fitted some Mtech drilled and grooved discs with some Brembo HP2000 sport pads, this was like a night and day difference from whatever was fitted before even during the beading in process. Plans to change the lines to braided when the fluid is due went in as I already have the uprated fluid sitting on the work bench. Another thing with the brakes was their poor appearance and it may sound sad but couple of hours and some black brake paint and them some new badges at £60 [smiley=bomb.gif] completed that job for now.
![Image]()
Next was the arch gap, it had to go, did plenty of research and looked into springs first as I wasn't convinced about putting coilovers onto the TT. Had many times before on polos and obviously air ride on the last but was still unsure. The more I looked into it the more springs seem to be next to nothing on the amount of drop and I thought f**k it. BC BR series coilovers were bought, but they had to do a bit of waiting. I thought whilst I was there, I would start sorting the front suspension as well in a hope to dial out the well know understeer. So after having the coilovers sitting around for nearly 5 weeks, acting like an inpatient child, I had the other parts I had ordered. Tyrol subframe locking collar kit and SuperPro anti lift kit and front wishbone bushes and a Powerflex dogbone mount. With help from a friend and my awesome over the road neighbour letting us use his unit and some specialist tools, we set to it on freezing cold 28th December. It really didn't go to plan though. In the end the frame had to come off and a new whole dogbone mount had to be fitted due to such a badly seized bolt. So after a long old fight and 2 days of work. It was all on! Of course, me being me, coilovers on the front as low as possible :roll: :mrgreen:
![Image]()
![Image]()
![Image]()
Took it to another friend of mine who has a hunter and had it all dialled in. Front camber set to 1.5 and rear to 2.5 with slight toe out on the front and in on the rear, if my awful memory serves me right, I'll have to check the spec sheet to confirm. With all of the modifications and the tracking, the car drives brilliantly! All the money and pissing around under the car was certainly worth it! It now looked and felt quality! Would definitely recommend any of the above parts to any owner on the hunt for a nice drive feel/feedback through the wheel.
![Image]()
![Image]()
![Image]()
![Image]()
![Image]()
![Image]()
As can already see, I'd managed to get a million miles from not touching it and leaving it as a standard car :roll: However I did manage a few months of not touching or ordering anything for TT and just kept on with it as it was. Probably should mention at this point the car is my daily just as the polo was, covering 50ish miles a day on my journey to work and back. I thought after all this time it was only fair to treat it, so I bought... Airride However, I fitted the management in the boot and test that it worked as it was 2nd hand and refreshed all the topmounts, lines, fittings and etc. But I had the car photoshopped, I'll have to try hunt down the photos, but I wasn't happy. Just wasn't the look I was going for and the struts sat in the garage for 3 weeks and I wasn't at all bothered to fit them. You must all know that feeling when you have a new part sat around and you cannot wait to get it fitted, didn't have that in the slightest and decided on selling it.
Found the photoshops:
![Image]()
![Image]()
This is where the controversy will come in for most. With the newly freed up cash, the next idea was time for trail...
![Image]()
![Image]()
So first the RS front bumper, it also came with a genuine grill so I was well pleased with this and love the look of the RS bumper over the TTS bumper, much more aggressive lines. Same with the spoiler, yes I know its not an RS, I'm 23 I can't afford an RS but even if I could I couldn't justify the amount the insure would cost me. The stealers already take plenty for the TTS. I love the look of the bumper so I had it, it's not far off standard (none plus) RS power anyhow and I'm not running the badges but I shouldn't let down the RS name too badly 😉 but if they know what they are looking at from the rear, you should know it isn't an RS.
Then comes the proper marmite decisions
![Image]()
![Image]()
After much thought and always wanted one, I bought a BGW, a very big one. Time to make the car look more 'racecar'
Once bought the realisation of how much work would be needed to fit it dawned. However with loads of measure, re-measuring and templates, I got there! The first custom uprights we made were only temporary and as you'll see they changed into the ones I drew up for the CAD program and as like with a lot of my things the lads I have at work are more than helpful!
Along with this massive in your face wing, I wanted additional parts that tie in. So very kindly, my misses bought me some Maxton design side skirts and splitter, quick 30 minute lunch break these were fitted and was very pleased! Had been driving around with only a big gay wing on a semi standard looking car and this I felt helped tie in the look more.
Next had my old school friend make me up a set of custom side stripes and shortly after decided to give it a good with tyre pens on the goodyears.
![Image]()
![Image]()
![Image]()
![Image]()
![Image]()
![Image]()
![Image]()
I liked this look, but they were incredibly small, had looked into actual tyre letting but so far the cheapest I have found was £100+ and I think that's far too much for some white on tyres. So again turned to my school friend and he made me some templates and was much more impressed with this! See how well the tyre pen lasts now its on the actual sidewall rather than in the textured lettering.
![Image]()
![Image]()
![Image]()
So this leads pretty much where we are at. Other than the last thing I have done...
![Image]()
![Image]()
![Image]()
![Image]()
Taken from the polo, I wanted yellow brakes again for so long but I thought this would never go with the finish of my wheels. I should of got the paint and bushes out earlier! I do wish I had the money to drop on some real yellow brakes but I can't justify spending the money on a set of 4-6-8 pots for the actual performance gains I'd have. So couple of hours and a brush will do for me! Have a picture of our naughty little cat joining in for good measure.
![Image]()
If you've actually managed to read through all my dyslexic mumbling to read what I've done to my car, then I thank you! I understand this might not everyones cuppa and its on a public forum but its mine and I love it.
Current plans are happening, mid way through trying to make a diffuser to tie in the rear more to the 'racecar' look. Progress from here on will probably seem far slower than everything else in this thread, but I have had the car a fair amount of time now and it becoming more and more my car. If anyone is interested my instagram where I post most things is: @Barr_end
Thanks for reading [smiley=book2.gif] 8) Unsure why some of the photos have decided to rotate as they are fine in my Flickr but hey ho :roll:
Hopefully I will continue to post beyond the updates I have put below in this but you'll find anything 2022 onward past page 31 in the thread!
There are constant updates - At multi points thorughout the many pages in this thread, had been slacking so sometimes there is gaps.
Would be best if you've just stumbled apon this, to read through, all the pages of my rambling as there is many more regular/small updates throughout - Sorry!
Timeline for the first have of this original post is backwards...
Latest first so you can see a brief over view of the cars stages over the years I have owned it, but there is much more throughout the thread.
Then after these brief snip-its of spec, it goes back to is where it all began - in a normal time layour moving forward not back
If you do, thank you for reading & hope you enjoy!
2021 updates have made this car really the best it has ever been, I am so pleased with it.
Now over 5 years & over 60k miles in this TTS, it's been amazing and I do love it far too much :lol:
So have the 2021 spec, then some photos!
Performance/chassis:
•3.5” trackslag downpipe + sportscat
•Milltek Catback exhaust (non-res)
•Toyosport intercooler & custom pipework + Murray clamps
•Hel performance Oil cooler
•Creation motorsport muffler delete & discharge pipe
•Forge silicone charge pipe joiner
•Loba high pressure fuel pump
•Custom pro-ram induction kit
•AEM meth injection kit
•OEM Rev G diverter
•Audi RS4 fuel pressure return valve
•AKS runner flap delete
•NGK Iridium BKR7EIX
•R8 coilpacks
•R-tech full PCV delete
•R-tech remap 'stage 2+' - stock ECU
•Helix organic clutch kit + DMF & braided clutch line
•Coolerworx shifter tower, Forge short shifter, WG relay shifter, Draft 42 shifter bushings & diesel geek runner bush
•Powerflex engine & dogmount inserts
•Rota Titans 18” Wheels + Goodyear Supersports (road) & 1Form 18" Wheels + Yokohama AD08Rs (track)
•Yellowspeed racing/Intermotiv custom coilovers
•Cloude9 magride delete modules
•Superpro Antilift Kit & front polybushes
•Tyrol subframe locking kit
•Whitline Rear anti-roll bar & links
•Ultraracing front strut bar
•TTRS brake calipers, CL RC5+ or RC6 pads, braided brake hoses & Tarox fluid
•Genuine Audi TTRS lower inner & modified vented arch liners
Exterior:
•Genuine Audi TTRS front bumper and black edition grill
•Custom vented front wings
•Fibreglass rear vented bumper + custom fog/rainlight
•Maxton designs splitter & side skirts
•Mk3 performance Carbon fibre spoiler
•Carbon fibre ~ door handles, front bumper insert, mirror blanks
•Dynamic mirror lenses
•Custom 4” carbon exhaust tips
•Custom front & rear tow eyes
•Black badges
Interior:
•Corbeau Revolution XL seats, alloy sidemounts & sliders
•Retrofitted OEM heated seat pads
•TRS 3 inch ultralight harnesses
•Cloude9 seat bases
•Cloude9 rear seat delete & net
•All rear boot panels retrimmed
•SW Motorsport cage
•Alpine X802D-U 8” headunit
•Focal audio speakers & tweeters
•Cloude9 vent adaptor
•Stack boost gauge
•Audi 8V S3 heater vents
•Liquid digital gauge
•All interior red illumination changed to white
•All bulbs to LED & double boot light
•Carbon fibre ~ centre console, glove box trim, grab handles, pull handles, interior mirror, clock besile, hand brake


2020 saw a huge change to the car.
Also marked 4 years with this car and 50k miles in it. Must say it's been brilliant.
2020 Spec & Photos...
Performance/chassis:
•3.5" trackslag downpipe + sportscat
•Milltek Catback exhaust (non-res)
•Toyosport intercooler & custom pipework
•Hel performance Oil cooler
•Creation motorsport muffler delete & discharge pipe
•Loba high pressure fuel pump
•Custom pro-ram induction kit
•AEM meth injection kit
•Forge recirc valve
•Audi RS4 fuel pressure return valve
•AKS runner flap delete
•NGK Iridium BKR7EIX
•R-tech remap - stock ECU
•Helix organic clutch & braided clutch line
•Coolerworx shifter tower, Forge short shifter, WG relay shifter, Draft 42 shifter bushings & diesel geek runner bush
•Cloude9 oil catch can kit
•Powerflex engine & dogmount inserts
•2Forge ZF5 18" Wheels
•Yellowspeed racing/Intermotiv custom coilovers
•KW magride delete modules
•Superpro Antilift Kit & polybushes
•Tyrol subframe locking kit
•Whitline Rear anti-roll bar & links
•Ultraracing front strut bar
•TTRS brake calipers, Tarox 2 piece discs, CL RC6 pads & braided brake hoses
•Genuine Audi TTRS inner arch liners & tubed brake cooling ducts
Exteriror:
•Genuine Audi TTRS front bumper and black edition grill
•Custom vented front wings
•Custom rear diffuser & rain light
•Maxton designs splitter & side skirts
•TTRS Carbon fibre spoiler
•Carbon fibre ~ petrol cap, mirror caps, front TTS emblem, door handles, front bumper insert
•Custom 4" exhaust tips
•Black badges
Interior:
•Motamec Evo-One seats, alloy sidemounts & sliders
•Cloude9 seat bases
•Cloude9 rear seat delete & net
•Cloude9 harness bar
•Cloude9 vent adaptor
•Stack boost gauge
•TRS 3 inch harnesses
•Euro Impulse gearknob
•Audi 8V S3 heater vents
•Liquid digital gauge
•Carbon fibre ~ centre console, glove box trim, grab handles, pull handles, interior mirror, clock besile, hand brake & magic tree


Here's just a few photos of updates, and spec list of 2019 - many more updates have happened since
Recaro Wingback bucket seats (optional factory extra)
Audi RSNE head unit (optional factory extra) & retrofitted AMI
Cloude 9 customs rear seat delete, bar & net - with yellow stitch to match yellow seat belts
Audi TTRS genuine front bumper and grills
Maxton designs splitter & side skirts
Custom made rear diffuser & exhaust tips
Japspeed Carbon fibre spoiler & custom uprights
Rear window Vortex generator
Window tints
Custom Audi sport Livery
Bola CSR 19 x 9.5" wheels
Mtech grooved discs, Brembo HP2000 sport pads & Hel braided brake hoses, ATE Typ2000 fluid
Yellowspeed Club performance coilovers
Superpro Antilift Kit & front wishbone polybushes
Tyrol subframe locking kit
Helix organic clutch & AKS braided clutch line
Forge short shifter, Draft42 shifter end link bushes, OEM metal relay shifter, Diesel geek slider
GFB DV+ valve
Custom Ramair induction
Milltek Full exhaust - 100 cell race cat & non-res
Toyosport intercooler (600x300x76mm plate & bar core)
2.5" custom pipework into modified creation motorsport charge & discharge pipes with turbo muffler
Loba HPFP (high pressure fuel pump)
Audi RS4 FPRV (fuel pressure return valve)
AKS runner flap delete
R-tech custom map - 380HP/410ftlbs
Carbon fibre - Interior:
Centre console, Glove box trim, Grab handles, Pull handles, Mirror surround, Cluster/clock bezel, Steering wheel, Gearknob, Hand brake, dash ends.
Carbon fibre - Exterior:
Petrol cap, Wing mirrors, Door handles, Front bumper lip, TTS front emblem


2018 updates will be on the later pages from 10 onward - This is where car took some serious changes for the better and where it went from good too decent.
After posting the recent look of my TTS I got asked to make a build thread and thought f**k it, might as well. If this isn't in the correct section could an Admin please move it though as I had no idea where to sling it. I have done a fair amount to my TT since I bought it back in September. A lot will probably dislike many, but one thing in particular about my car bur I built it for me and I can honestly say I love it
So before my TTS I owned my polo GTI for 2.5 years, done a hell of a lot to it mainly all myself, but I won't go on about, just a few pictures..


As you can see I went pretty far with it, not only cosmetic but also a lot of engine and chassis work done. I wish now I could of kept it, but I had no space and at 23 I can't afford to run, insure and modify 2 cars. So once only a week or so after buying my TTS the polo got stripped for parts and scrapped


Here's how I got the TTS, however with some nice extras, heated Recaro wingbacks :mrgreen: and uprated 2010? satnav with the gloss surround and media button. However, have and AUX port, which doesn't work, rewired the wires into the 32? wire plug as seen in a thread and activated it a vag-com but still nothing. So if someone could shed some light please PM me!
Other than this it was relatively standard minus the rs rep grill still with the badge [smiley=bomb.gif], however was clear that the previous owners weren't ones to spend money once buying the car, had some rep wheels, cheap as chips Teflon tyres and what looked like brand new brakes but they were warped, felt over 50-60 with heavy breaking. Although these slight issues, I was still massively happy, and as much as I loved the polo, there was no comparison on driving feel and interior spec, a whole other league. First couple of things I did was just change few odds and sods with my vag com just to make it exactly what I wanted with what you can code in through it. Also got my plate onto the car pretty quickly too.

I tried to convince myself and others around me that I wasn't going to go silly and it was a decent car and wouldn't need me fiddling around with it, but who was I kidding :roll: Within 2 weeks of owning the car I was booked in with local vag tuner AMD. Car received a lot of parts there and this is the first time I had ever, literally ever let any garage touch any of my cars (minus tracking). I was a little nervous to say the least!
But once I picked up the car, I was more than relieved! So whilst in, had the Cambelt & pump done, forge short shifter, GFB DV+, forge induction kit and a milltek catback (regret not buying a full system and to be fair maybe even choosing the milltek). Asked for a quick test drive before handing over the money and it was brilliant! New intake and DV+ give a lovely turbo flutter on partial throttle up to 4k and past that a nice grunt from the engine whilst feeling much quicker. At the time I hadn't even cared about the exhaust note I was too much of a child, lightly putting my foot down to keep changing gear. But was presently surprised on the drive home with no drone what so ever even after speccing the non-res which from research people said was loud and awful. Anyways the car made a healthy 316BHP/333Ftlbs so I was well chuffed.


Next on the list was those awful tyres! They were scary enough in the dry but in the wet they were honestly death. My polo had 5.5 & 7.5 degrees of camber, with 9.5 wide wheels with 185/45 tyres and it drove better round corners in the wet than the TT could. They were shocking, the tyres had to go But I wasn't going to put some nice new rubber on nasty rep wheels, so I hunted all over the internet for wheel specs on the TT. Wheel spec and fitment for the polo I had become a right nerd so I knew what I was looking for just had to find out enough about the TT chassis/arches. Whilst doing this I took the car to Audi for the remainder of service items. I had my pants pulled down! £179 for an oil change
after doing everything myself for the last 4 years knowing the cost of parts, I was shocked but wanted the stamp in the book. Along with the oil, the haldex which AMD couldn't do and Audi nicely enough fitted my 1 stage cooler plugs for free which I thought was a result. However after picking up my car and seeing the trip on 8mpg and 15-20 miles had been put on the car I wasn't impressed! Think after that and for the price I will just return to doing bits on the car myself. Atleast I know exactly what's happening.


In the end only a week after coming back from AMD I had these packages arrive. I went for 19 x 9.5 Bola CSR wheels all around, in bronze, which as the time I was sooo unsure on, but my misses convinced me. Also with some 245/35/19 Goodyear Asymmetric 3s to mount on them. Once I managed to get them bolted on, the doubts about bronze went. Women can be right about some things :lol: 😉


Also had a friend of mine run over the car with mop after some long hours cleaning and de-ironizing the car. The results speak for themselves, he managed to make white shiny!

Just after the mopping I received back the other part I had ordered when the car was at AMD. I managed to find a genuine RS spoiler and after a 2 week wait and a pretty poor job, I had it painted white. I bolted it on and was suddenly unsure if I was happy with it or not. Yes I know its not an RS, sorry if bolting an RS offends you, but as mentioned at 23, I can't afford an RS and I'm more than happy to bolt on the parts which I find enhance the car.


As much as I was happy with the new wheels, it highlighted, 2 major issues though. The awful arch gap and the poorly looking brakes. Luckily I had 80% of the brakes covered. With some right fitting (rounded bolts and rust) I fitted some Mtech drilled and grooved discs with some Brembo HP2000 sport pads, this was like a night and day difference from whatever was fitted before even during the beading in process. Plans to change the lines to braided when the fluid is due went in as I already have the uprated fluid sitting on the work bench. Another thing with the brakes was their poor appearance and it may sound sad but couple of hours and some black brake paint and them some new badges at £60 [smiley=bomb.gif] completed that job for now.

Next was the arch gap, it had to go, did plenty of research and looked into springs first as I wasn't convinced about putting coilovers onto the TT. Had many times before on polos and obviously air ride on the last but was still unsure. The more I looked into it the more springs seem to be next to nothing on the amount of drop and I thought f**k it. BC BR series coilovers were bought, but they had to do a bit of waiting. I thought whilst I was there, I would start sorting the front suspension as well in a hope to dial out the well know understeer. So after having the coilovers sitting around for nearly 5 weeks, acting like an inpatient child, I had the other parts I had ordered. Tyrol subframe locking collar kit and SuperPro anti lift kit and front wishbone bushes and a Powerflex dogbone mount. With help from a friend and my awesome over the road neighbour letting us use his unit and some specialist tools, we set to it on freezing cold 28th December. It really didn't go to plan though. In the end the frame had to come off and a new whole dogbone mount had to be fitted due to such a badly seized bolt. So after a long old fight and 2 days of work. It was all on! Of course, me being me, coilovers on the front as low as possible :roll: :mrgreen:


Took it to another friend of mine who has a hunter and had it all dialled in. Front camber set to 1.5 and rear to 2.5 with slight toe out on the front and in on the rear, if my awful memory serves me right, I'll have to check the spec sheet to confirm. With all of the modifications and the tracking, the car drives brilliantly! All the money and pissing around under the car was certainly worth it! It now looked and felt quality! Would definitely recommend any of the above parts to any owner on the hunt for a nice drive feel/feedback through the wheel.


As can already see, I'd managed to get a million miles from not touching it and leaving it as a standard car :roll: However I did manage a few months of not touching or ordering anything for TT and just kept on with it as it was. Probably should mention at this point the car is my daily just as the polo was, covering 50ish miles a day on my journey to work and back. I thought after all this time it was only fair to treat it, so I bought... Airride
However, I fitted the management in the boot and test that it worked as it was 2nd hand and refreshed all the topmounts, lines, fittings and etc. But I had the car photoshopped, I'll have to try hunt down the photos, but I wasn't happy. Just wasn't the look I was going for and the struts sat in the garage for 3 weeks and I wasn't at all bothered to fit them. You must all know that feeling when you have a new part sat around and you cannot wait to get it fitted, didn't have that in the slightest and decided on selling it. Found the photoshops:


This is where the controversy will come in for most. With the newly freed up cash, the next idea was time for trail...


So first the RS front bumper, it also came with a genuine grill so I was well pleased with this and love the look of the RS bumper over the TTS bumper, much more aggressive lines. Same with the spoiler, yes I know its not an RS, I'm 23 I can't afford an RS but even if I could I couldn't justify the amount the insure would cost me. The stealers already take plenty for the TTS. I love the look of the bumper so I had it, it's not far off standard (none plus) RS power anyhow and I'm not running the badges but I shouldn't let down the RS name too badly 😉 but if they know what they are looking at from the rear, you should know it isn't an RS.
Then comes the proper marmite decisions

After much thought and always wanted one, I bought a BGW, a very big one. Time to make the car look more 'racecar'
Once bought the realisation of how much work would be needed to fit it dawned. However with loads of measure, re-measuring and templates, I got there! The first custom uprights we made were only temporary and as you'll see they changed into the ones I drew up for the CAD program and as like with a lot of my things the lads I have at work are more than helpful!
Along with this massive in your face wing, I wanted additional parts that tie in. So very kindly, my misses bought me some Maxton design side skirts and splitter, quick 30 minute lunch break these were fitted and was very pleased! Had been driving around with only a big gay wing on a semi standard looking car and this I felt helped tie in the look more.
Next had my old school friend make me up a set of custom side stripes and shortly after decided to give it a good with tyre pens on the goodyears.


I liked this look, but they were incredibly small, had looked into actual tyre letting but so far the cheapest I have found was £100+ and I think that's far too much for some white on tyres. So again turned to my school friend and he made me some templates and was much more impressed with this! See how well the tyre pen lasts now its on the actual sidewall rather than in the textured lettering.


So this leads pretty much where we are at. Other than the last thing I have done...
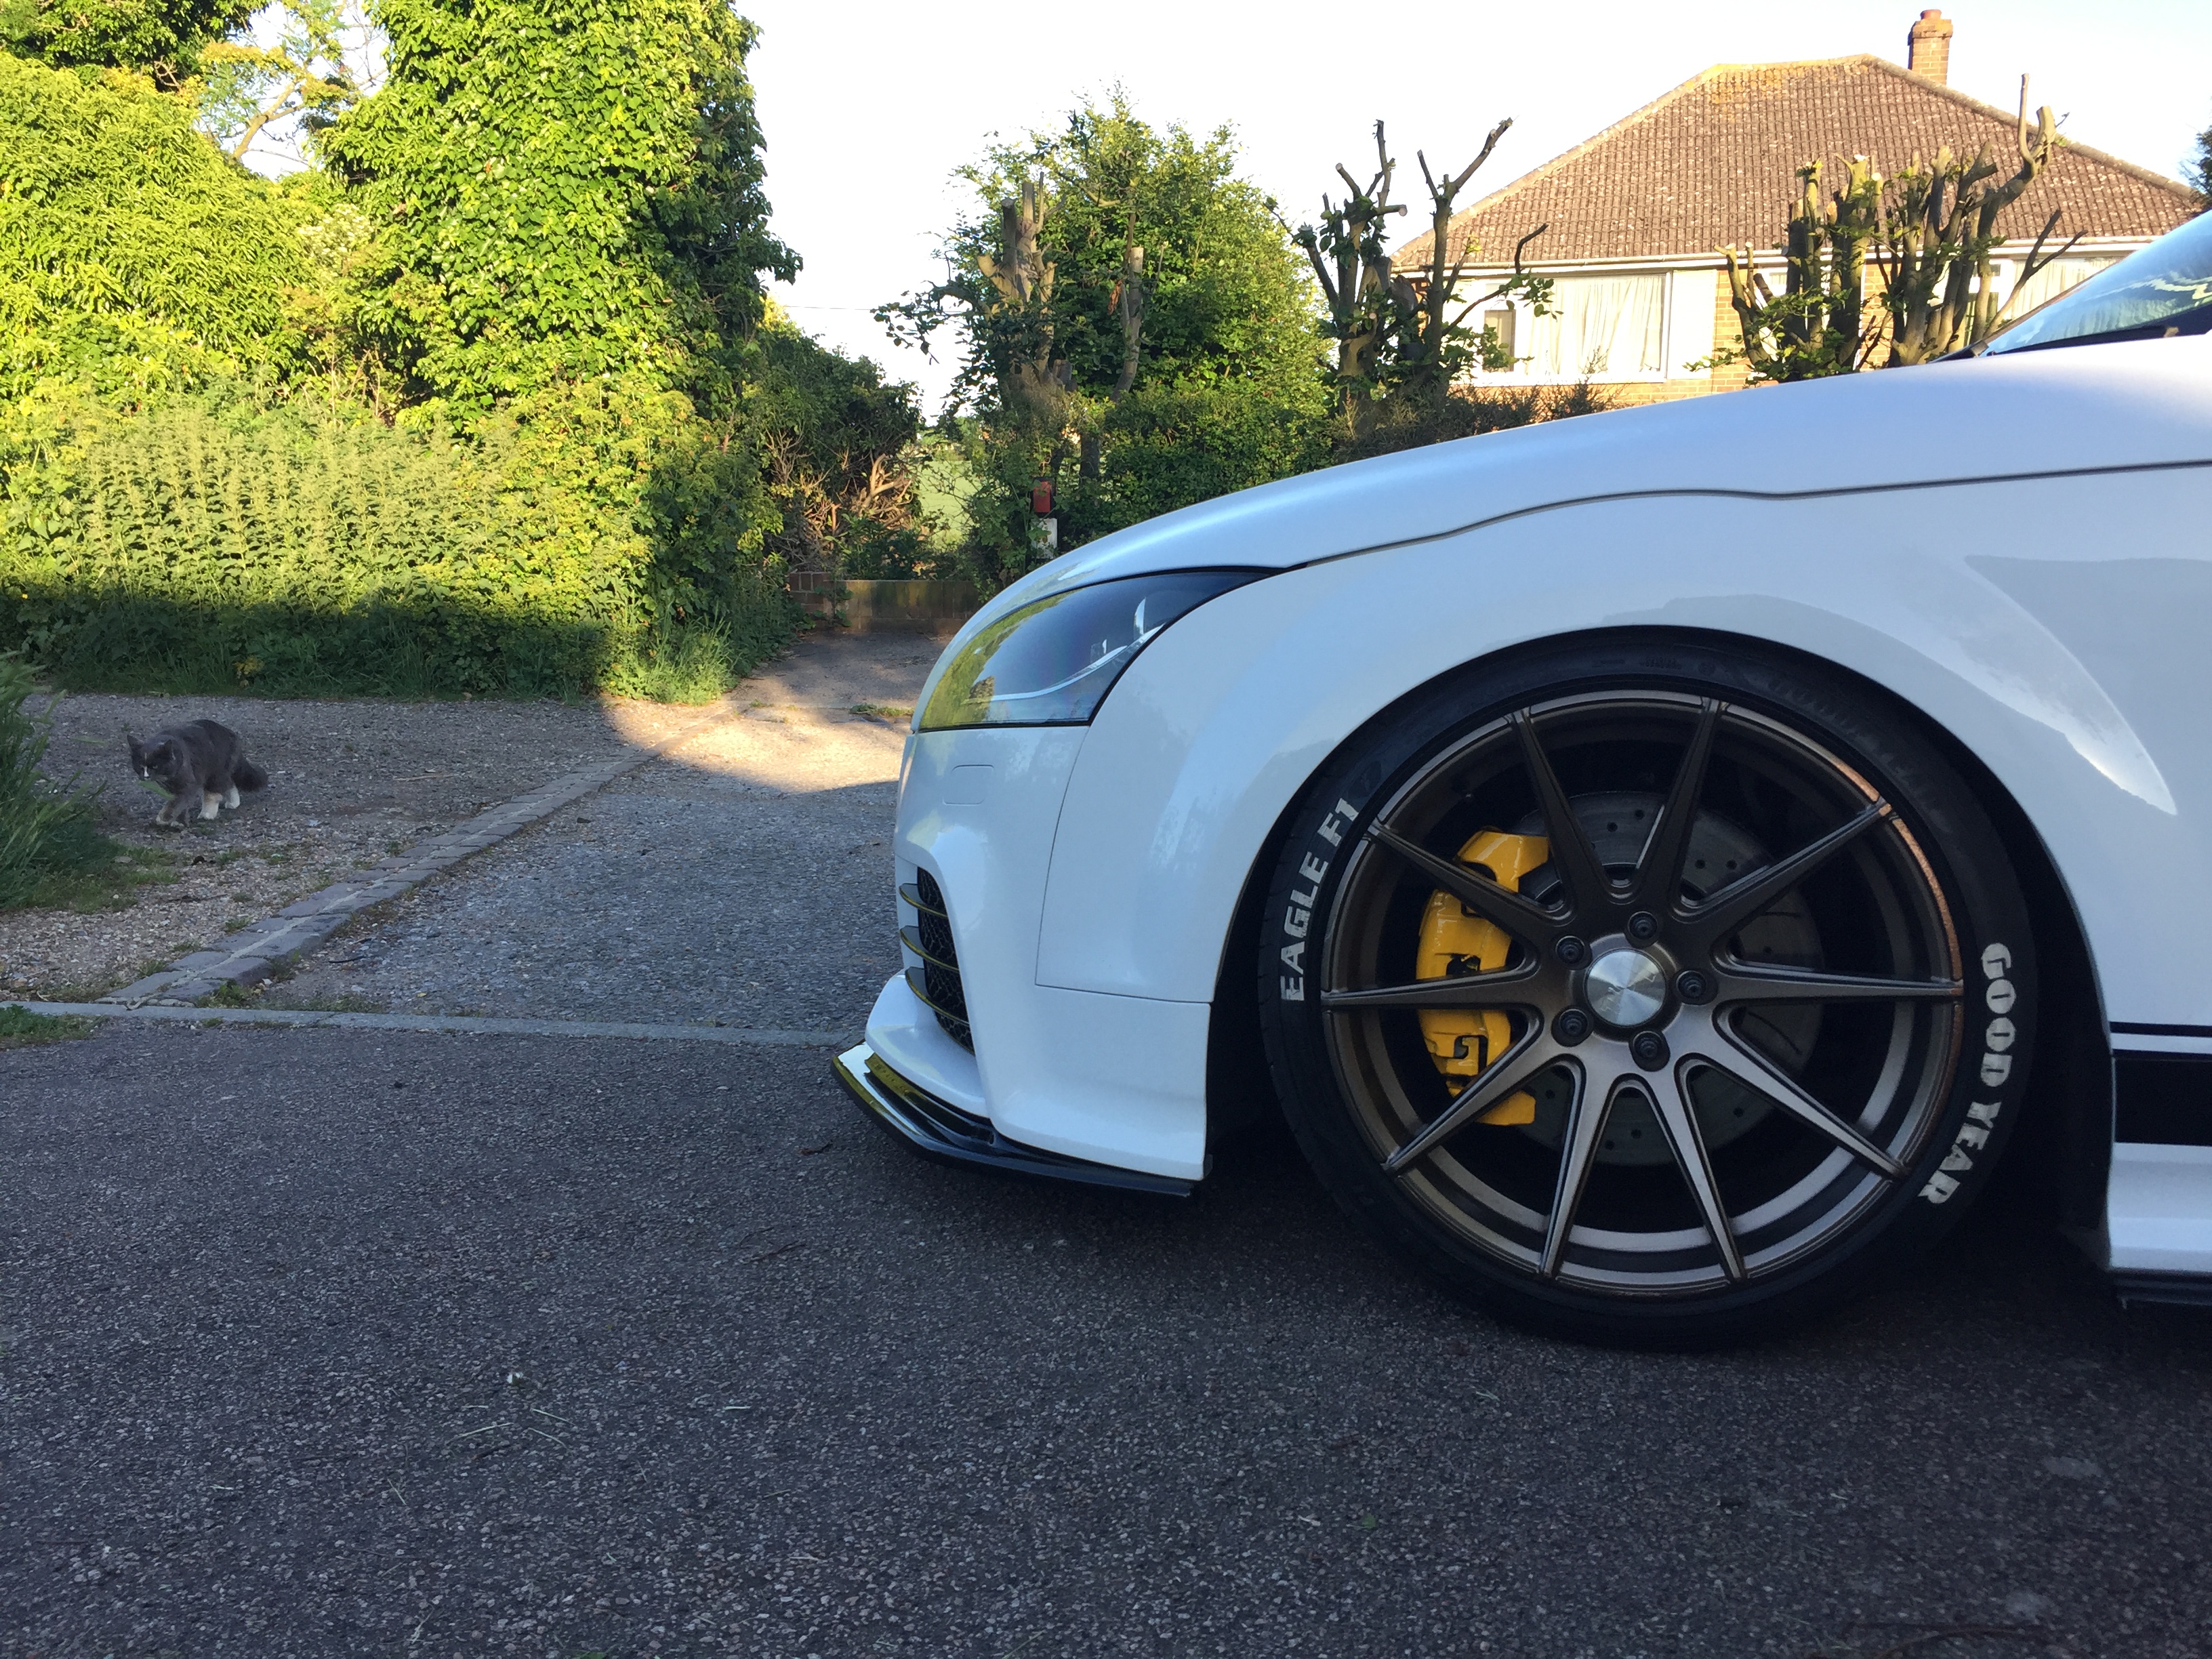


Taken from the polo, I wanted yellow brakes again for so long but I thought this would never go with the finish of my wheels. I should of got the paint and bushes out earlier! I do wish I had the money to drop on some real yellow brakes but I can't justify spending the money on a set of 4-6-8 pots for the actual performance gains I'd have. So couple of hours and a brush will do for me! Have a picture of our naughty little cat joining in for good measure.

If you've actually managed to read through all my dyslexic mumbling to read what I've done to my car, then I thank you! I understand this might not everyones cuppa and its on a public forum but its mine and I love it.
Current plans are happening, mid way through trying to make a diffuser to tie in the rear more to the 'racecar' look. Progress from here on will probably seem far slower than everything else in this thread, but I have had the car a fair amount of time now and it becoming more and more my car. If anyone is interested my instagram where I post most things is: @Barr_end
Thanks for reading [smiley=book2.gif] 8) Unsure why some of the photos have decided to rotate as they are fine in my Flickr but hey ho :roll:


